How to clean flexible air ducts
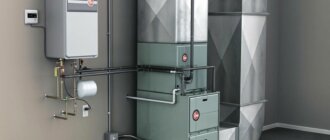
In today’s modern homes, flexible air ducts are a popular choice for heating and cooling systems. However, over time, these ducts can become dirty and clogged with dust, dirt, and other debris. This can negatively affect the efficiency of your HVAC system and even lead to health issues for you and your family.
But fear not! Flex duct cleaning is not an impossible task. With the right techniques and tools, you can effectively clean your flexible ductwork and restore the air quality in your home. In this step-by-step guide, we will walk you through the process of how to clean flexible air ducts and share some expert tips to help you get the best results.
First and foremost, it is important to understand that flexible ductwork can be cleaned. While it may require a bit more effort compared to cleaning rigid metal ducts, the process is still very much doable. The key is to use the right methods and follow a systematic approach to ensure thorough cleaning.
So, what is the best way to clean flex ducts? It begins with gathering the necessary tools, such as a vacuum cleaner with a flexible hose attachment, a brush or soft cloth, and a screwdriver or pliers to remove the vent covers. Additionally, it is crucial to wear protective gear, such as gloves and a mask, to protect yourself from the dust and debris.“How often should air conditioning ducts be cleaned?”
Step-by-Step Guide on Cleaning Flexible Air Ducts Expert Tips and Techniques
Cleaning flexible air ducts, also known as flex duct cleaning, is an essential maintenance task to ensure optimal air quality and proper airflow in your home or building. While it is generally recommended to hire a professional for duct cleaning, you can also do it yourself if you have the right tools and knowledge.
Can flexible ductwork be cleaned? The answer is yes. With the right techniques and tools, you can effectively clean flex ducts and improve the efficiency of your HVAC system. Here is the best way to clean flex ducts:
- Gather the necessary materials: Before starting the cleaning process, make sure you have the following materials: a screwdriver, a vacuum cleaner with a long hose attachment, soft-bristle brush or duct cleaning brush, duct mastic or foil tape, and a clean cloth.
- Turn off the HVAC system: It is crucial to turn off your HVAC system before cleaning the flexible air ducts. This will prevent any airflow that could cause dust and debris to spread throughout your home.
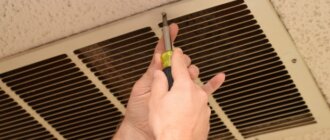
- Access the flex ducts: Use a screwdriver to remove the grilles or registers covering the duct openings. This will give you access to the flexible air ducts for cleaning.
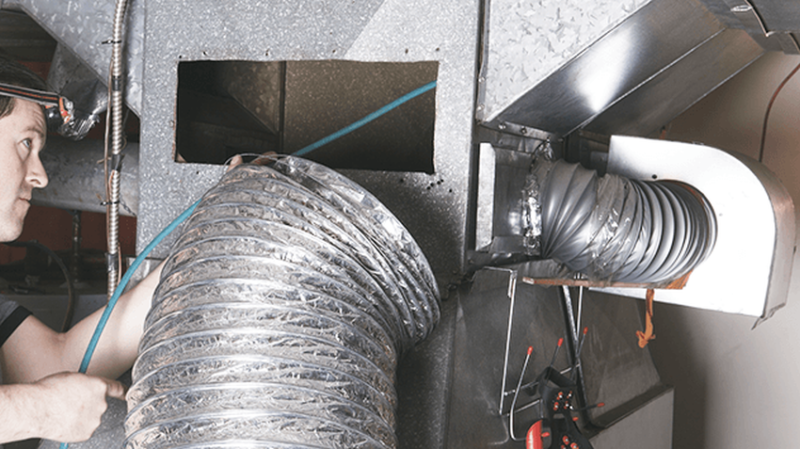
- Vacuum the ducts: Attach the long hose attachment to your vacuum cleaner and carefully insert it into the flex ducts. Move the hose back and forth to remove loose dust and debris. Be gentle to avoid damaging the flexible ductwork.
- Brush the ducts: Use a soft-bristle brush or a duct cleaning brush to scrub the inside of the flex ducts. This will help dislodge any stubborn dust or debris that the vacuum cleaner might have missed. Be sure to reach as far as possible into the ducts for a thorough cleaning.
- Seal any leaks: Inspect the flex ducts for any leaks or loose connections. Use duct mastic or foil tape to seal any leaks or gaps to ensure airtight ductwork.
- Clean the grilles or registers: While the flex ducts are drying, clean the grilles or registers that you removed earlier. Use a soft cloth or a mild cleaning solution to wipe away any dust or dirt.
- Reinstall the grilles or registers: Once the flex ducts are clean and dry, reattach the grilles or registers to their original positions.
- Turn on the HVAC system: Finally, turn on your HVAC system and check for proper airflow. You should notice improved air quality and better overall performance.
It is important to keep in mind that cleaning flexible air ducts is not a one-time task. Regular maintenance and cleaning are necessary to prevent the accumulation of dirt, mold, or other contaminants in the ductwork. Depending on the level of pollution and usage, you may need to clean your flex ducts every few years or even more frequently.
By following this step-by-step guide and using expert tips and techniques, you can effectively clean your flexible air ducts and maintain a healthy and efficient HVAC system.
Gather the Necessary Tools
Before you begin the process of cleaning your flexible air ducts, it is important to gather all the necessary tools to ensure a thorough and efficient cleaning. Here is a list of items you will need:
- Duct cleaning brush: This long, flexible brush is designed specifically for cleaning the inside of flexible air ducts. It is important to choose a brush that fits the size of your ducts to maximize cleaning effectiveness.
- Vacuum cleaner: A powerful vacuum cleaner with a long hose attachment will be used to remove loose debris and dust from the flexible ductwork.
- Screwdriver: You may need a screwdriver to remove any access panels or grilles that are covering the air ducts.
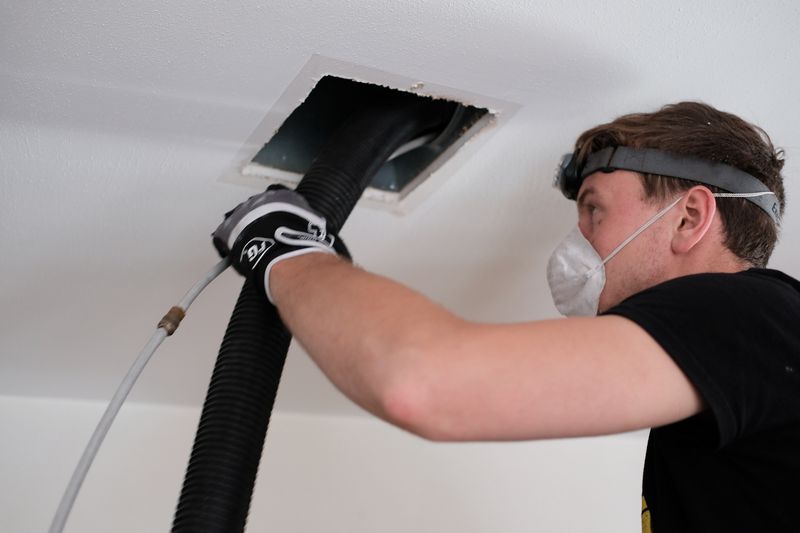
- Protective gear: Cleaning air ducts can be a dusty and dirty job, so it is important to protect yourself by wearing gloves, safety glasses, and a dust mask.
- Cleaning solution: Depending on the level of dirt and debris in your flexible air ducts, you may need a cleaning solution. Be sure to choose a non-toxic solution that is safe to use on your ductwork.
- Bucket: A bucket can be used to hold the cleaning solution and to rinse out the brush during the cleaning process.
- Ladder: If your air ducts are located in high areas such as the ceiling, you may need a ladder or step stool to access them safely.
- Drop cloths or plastic sheets: To protect your furniture and flooring from dust and debris during the cleaning process, it is recommended to lay down drop cloths or plastic sheets.
By ensuring you have all the necessary tools before you begin, you can make the cleaning process more efficient and effective. Remember to always follow safety precautions and guidelines when cleaning your flexible air ducts.
Turn Off the HVAC System
Before you begin cleaning flexible ductwork, it is important to turn off the HVAC system. This step is essential to ensure your safety and prevent any accidental damage to the system.
When the HVAC system is turned off, it eliminates the risk of injury from moving parts or sudden airflow. Additionally, it prevents the circulation of dust and debris during the cleaning process, keeping your indoor air quality clean and healthy.
Remove and Clean the Registers
When it comes to cleaning flexible air ducts, one important step is to remove and clean the registers. Registers, also known as vents, are the grilles that cover the openings in your walls or floors where the air is released into the room.
Before you start cleaning the registers, it’s essential to turn off the HVAC system to prevent any dust or debris from being pushed back into the ducts during the cleaning process. Additionally, make sure to wear protective gloves and a mask to avoid breathing in any dust or allergens.
Here are the steps to remove and clean the registers:
- Prepare the necessary tools: You’ll need a screwdriver or a drill with the appropriate attachment to remove the screws that hold the registers in place.
- Loosen the screws: Use the screwdriver or drill to loosen the screws securing the register to the wall or floor. Take care not to damage the screws or the surrounding area.
- Remove the register: Once the screws are loose, gently pull the register away from the wall or floor. Be careful not to damage the ductwork or any other components.
- Clean the register: Take the register outside or to a well-ventilated area for cleaning. Use a brush or vacuum cleaner with a brush attachment to remove any dust, dirt, or debris from the surface of the register. You can also use a mild detergent or cleaner for stubborn stains or buildup. Rinse the register thoroughly with water and let it dry before reinstalling.
- Inspect the duct opening: While the register is removed, take a moment to inspect the duct opening for any visible dirt, debris, or mold. If necessary, use a vacuum cleaner or a long-handled brush to remove any contaminants.
- Reinstall the register: Once the register is clean and dry, carefully position it back into place. Align the screw holes and tighten the screws securely but not excessively, as overtightening can damage the register or the surrounding area.
By removing and cleaning the registers, you can ensure that the air flowing through your flexible ducts is clean and free from any obstructions. Regular cleaning of the registers can also improve the efficiency of your HVAC system and maintain better indoor air quality.
Inspect the Ducts for Mold or Mildew
Before cleaning flexible air ducts, it is important to inspect them for mold or mildew. Mold and mildew can thrive in moist environments, which can be found inside air ducts if there is a water leak or condensation buildup. This not only poses a health risk but can also impact the efficiency and performance of your HVAC system.
Steps to inspect the ducts for mold or mildew:
- Turn off the HVAC system: Before inspecting the ducts, make sure to turn off the HVAC system to avoid the spread of any mold spores.
- Wear protective gear: It is recommended to wear gloves, goggles, and a mask to protect yourself from any potential exposure to mold or mildew.
- Use a flashlight: Shine a flashlight inside the ductwork to check for any signs of mold or mildew. Look for discoloration, black spots, or a musty odor.
- Inspect the junctions and seams: Pay close attention to the junctions and seams of the flexible ductwork as mold and mildew tend to accumulate in these areas.
- Look for water damage: Check for any signs of water damage, such as damp insulation or rusted metal, as this can indicate a water leak.
If you notice any signs of mold, mildew, or water damage, it is important to address the issue promptly to prevent further damage and to ensure the cleanliness of your air ducts.
Remember, cleaning flexible air ducts that are contaminated with mold or mildew requires professional assistance. A certified HVAC technician can safely and effectively clean the ducts to remove any contaminants and improve the air quality in your home or office.
Vacuum the Ducts
Once you have prepared the necessary tools and safety equipment, it’s time to start the cleaning process. The first step is to vacuum the flexible air ducts to remove any loose dust and debris.
To vacuum the ducts, follow these steps:
- Turn off the HVAC system to prevent the spread of dust during the cleaning process.
- If possible, remove the vent covers or grilles to access the duct openings more easily.
- Attach a long hose and a soft-bristle brush attachment to your vacuum cleaner.
- Insert the brush attachment into the duct openings and move it back and forth to dislodge dust and debris.
- As you vacuum, pay extra attention to areas where dust buildup is visible.
- Continue vacuuming all accessible ducts in your home, including supply and return ducts.
- If you encounter any blockages or stubborn dirt, use a stiff brush or a broom handle to gently loosen the debris before vacuuming.
Remember to take breaks as needed and empty the vacuum cleaner’s canister or replace the bag when it becomes full. This will ensure optimal suction power and prevent dust from being released back into the air.
By vacuuming the flex ducts, you will remove the initial layer of dust and debris, making it easier to proceed with the next steps of cleaning. However, keep in mind that vacuuming alone may not eliminate all contaminants, especially if your ducts have not been cleaned for an extended period.
Use a Cleaning Solution
Flexible air ducts can become dirty and contaminated over time, especially if they are not properly maintained. Cleaning flexible air ducts is an important part of regular HVAC system maintenance, as it can improve indoor air quality and the efficiency of the system.
When it comes to cleaning flexible air ducts, using a cleaning solution can be a highly effective method. The right cleaning solution can help break down and remove dirt, dust, and other contaminants that may have accumulated inside the ducts.
Here’s how to clean flexible air ducts using a cleaning solution:
- Start by turning off the HVAC system and disconnecting the power supply.
- Inspect the flexible air ducts for any visible signs of damage. If there are any tears, rips, or loose connections, repair or replace the damaged sections before proceeding with the cleaning process.
- Prepare the cleaning solution by diluting it according to the manufacturer’s instructions. It’s important to use a cleaning solution specifically designed for cleaning flexible air ducts.
- Using a soft-bristled brush, gently scrub the inside of the flexible ductwork. Pay extra attention to areas with heavy buildup or stubborn stains.
- Rinse the ducts thoroughly with clean water to remove any residue from the cleaning solution.
- If possible, allow the flexible ducts to air dry. This will help prevent the growth of mold or mildew.
- Reconnect the flexible air ducts to the HVAC system and turn the power supply back on.
It’s important to note that cleaning flexible air ducts can be a complex task and may require professional assistance. If you are unsure about how to clean your flexible air ducts or if you encounter any difficulties during the cleaning process, it’s always best to consult a qualified HVAC technician.
Cleaning flexible air ducts regularly can help maintain a clean and efficient HVAC system, improve indoor air quality, and prolong the lifespan of your ductwork. By using a cleaning solution and following the proper cleaning techniques, you can effectively remove dirt, dust, and contaminants from your flexible air ducts.
Scrub the Ducts
Flex duct cleaning is an important aspect of maintaining good indoor air quality. Over time, dust, debris, and other contaminants can accumulate in flex ducts, potentially leading to issues such as decreased airflow and even mold growth. But can you clean flex ducts? The short answer is yes, but it’s not always a DIY task.
If you’re wondering if you can clean flex ducts yourself, the answer will depend on several factors. While it is possible to clean some flex ducts on your own, others may require professional help. Additionally, the level of contamination and access to the ductwork will also determine if DIY cleaning is appropriate.
To start cleaning flexible ductwork, it’s important to assess the level of contamination and determine if the ducts are suitable for cleaning. Some flexible ductwork is not designed to be cleaned and may require replacement instead. Consulting with a professional can help you determine the best course of action for your specific situation.
If cleaning your flexible air ducts is an option, here are some steps to follow:
- Gather necessary materials: Before starting, ensure that you have all the necessary tools and materials, including a vacuum cleaner with a brush attachment, a long-handled brush, disinfectant cleaner, and protective gear such as gloves and a mask.
- Turn off the HVAC system: Before cleaning, it’s crucial to shut off the HVAC system to prevent any debris or contaminants from circulating throughout your home.
- Remove vent covers and vacuum: Carefully remove the vent covers from the flexible ducts and use a vacuum cleaner with a brush attachment to remove loose dust and debris from the vent openings.
- Scrub the ducts: Using a long-handled brush and a disinfectant cleaner, scrub the inside of the flexible ducts to remove any built-up dirt, mold, or other contaminants. Pay special attention to areas where mold growth may be present.
- Vacuum the ducts: After scrubbing, use a vacuum cleaner with a brush attachment to remove any dislodged dirt and debris from the ducts.
- Apply disinfectant: Once the ducts are clean, apply a disinfectant cleaner to kill any remaining bacteria or mold spores. Follow the manufacturer’s instructions for the proper application and contact time.
- Replace vent covers: After the cleaning process is complete, replace the vent covers securely.
- Consider professional help: If you’re unsure about the cleanliness of your flexible ducts or if you encounter any issues during the cleaning process, it’s best to consult with a professional HVAC technician who has experience in cleaning flexible ductwork.
Cleaning flexible air ducts can help improve indoor air quality and maintain the efficiency of your HVAC system. However, it’s important to assess the situation and determine if DIY cleaning is appropriate or if professional help is needed. Remember to follow proper safety precautions and consult with experts if you have any doubts or concerns about cleaning flexible ductwork.
Rinse the Ducts
After completing the initial steps of vacuuming and brushing the flex ducts, it is important to rinse them for a thorough cleaning. Rinsing the ducts helps to remove any remaining dust, dirt, or debris that may not have been completely removed during the previous steps. Here’s how to properly rinse your flexible air ducts:
- Prepare the cleaning solution: Mix a mild detergent or dish soap with warm water in a bucket or basin. Avoid using harsh chemicals or strong cleaning agents as they can damage the flex ducts.
- Dampen a clean cloth or sponge: Dip a soft cloth or sponge into the cleaning solution, making sure it is damp but not dripping with water.
- Gently wipe the surface: Starting from one end of the flex duct, carefully wipe the surface of the ducts with the damp cloth or sponge. Use gentle, circular motions to remove any remaining dirt or grime. Be sure to cover the entire surface of the ducts, including the bends and corners.
- Rinse with clean water: Once you have wiped the entire surface of the flex ducts, rinse them off with clean water. You can use a spray bottle or a hose to spray water onto the ducts. Make sure that the water pressure is not too high, as it may damage the ducts.
- Dry the ducts: After rinsing, allow the flex ducts to air dry completely. This may take a few hours or longer, depending on the temperature and humidity in the area.
- Inspect for cleanliness: Once the ducts are dry, visually inspect them to ensure that they are clean and free from any remaining dirt or debris. If necessary, repeat the cleaning process.
Remember, regular cleaning of flexible air ducts is essential to maintain good indoor air quality and ensure the proper functioning of your HVAC system. By following these steps, you can effectively clean your flex ducts and improve the overall air circulation in your home or office.
Dry the Ducts
Once you have completed the cleaning process for your flexible air ducts, it is important to ensure that they are dry before reconnecting them. This step is crucial to prevent mold and mildew growth in your ductwork.
Here is how you can effectively dry your flexible air ducts:
- Before beginning the drying process, make sure that the ducts are completely free of any moisture.
- Inspect the ducts for any visible signs of water or moisture. If you notice any damp spots or areas, use a clean cloth or sponge to absorb the moisture.
- Once you have absorbed as much moisture as possible, allow the ducts to air dry. Open windows or use fans to promote airflow and speed up the drying process.
- If your flexible air ducts are located in a damp or humid area, it may be beneficial to use a dehumidifier to remove excess moisture from the air.
- While the ducts are drying, take the time to clean and dry any other components that were removed during the cleaning process, such as grilles or registers.
- After the ducts have fully dried, carefully reconnect them to the HVAC system, ensuring a secure fit.
Remember, proper drying of your flexible air ducts is essential to maintain a clean and healthy indoor environment. By following these steps, you can effectively dry your ducts and minimize the risk of mold and mildew growth.
Inspect the HVAC Components
Before beginning the cleaning process of flexible air ducts, it is crucial to inspect the HVAC components thoroughly. This step will help identify any potential issues or damage that may interfere with the cleaning process or affect the overall performance of the ductwork.
Here are some key components to inspect:
- Air Filters: Check the condition of the air filters and replace them if necessary. Clogged or dirty filters can restrict airflow and reduce the efficiency of the HVAC system.
- Vents and Registers: Inspect the vents and registers for any blockages, dust, or debris. Ensure that they are in good condition and open properly.
- Grilles and Diffusers: Clean the grilles and diffusers to remove any dirt or dust build-up. This will improve air quality and prevent the spread of contaminants.
- Condenser Unit: Examine the condenser unit for any dirt, leaves, or debris that may obstruct airflow. Clear any obstructions and ensure that the unit is clean and functioning properly.
During the inspection, make sure to wear protective gear such as gloves and a mask to avoid contact with dust or pollutants. If you notice any significant damage or issues with the HVAC components, it is recommended to consult a professional for further assessment and repair.
Inspecting the HVAC components before cleaning the flexible ductwork is essential for maintaining the efficiency and effectiveness of your HVAC system. It ensures that the cleaning process can be carried out smoothly without any hindrances, and helps prevent further damage to the ductwork or the system as a whole.
Replace the Registers
After cleaning the flexible air ducts, it’s important to replace the registers as well. The registers, also known as vents or grilles, are the visible openings where air enters or exits the duct system. Over time, these registers can accumulate dust, dirt, and debris, which can restrict airflow and reduce the efficiency of your HVAC system. Therefore, it’s necessary to clean or replace them as part of a thorough air duct cleaning process.
Here are the steps to replace the registers:
- Start by identifying the type and size of the registers in your home. Registers come in various sizes, shapes, and materials, such as metal, plastic, or wood.
- If the registers are visibly dirty or damaged, it’s recommended to replace them with new ones. You can purchase replacement registers from hardware stores or online retailers.
- Before removing the old registers, ensure that your HVAC system is turned off to avoid any accidental airflow or damage.
- To remove the old registers, gently pull them away from the wall or ceiling. Some registers may require screws or fasteners to be removed beforehand.
- Clean the area around the register opening using a vacuum or damp cloth to remove any remaining dust or debris.
- Inspect the duct opening for any signs of damage or blockage. If necessary, clean or repair the duct opening before installing the new register.
- Take the new register and align it with the duct opening. If needed, use screws or fasteners to secure the register in place.
- Ensure that the new register fits snugly and there are no gaps between the register and the duct opening.
- Repeat the process for all the registers in your home, including supply registers (where air enters the room) and return registers (where air is pulled back into the HVAC system).
- Once all the registers are replaced, turn on your HVAC system and check for proper airflow and function.
By replacing the registers after cleaning flexible air ducts, you can ensure that your HVAC system operates efficiently and effectively. Clean registers allow better airflow, improve indoor air quality, and maintain the overall performance of your heating and cooling system. Regular maintenance and cleaning of both the ducts and registers are essential for optimal HVAC performance.
Turn On the HVAC System
After completing the flex duct cleaning process, it is important to turn on the HVAC (Heating, Ventilation, and Air Conditioning) system to ensure that everything is functioning properly. This step is crucial as it allows you to check the airflow and detect any potential issues that may have been missed during the cleaning process.
Here are the steps to turn on the HVAC system:
- Set the thermostat: Adjust the temperature settings on the thermostat to activate the HVAC system. Make sure to set it to the desired temperature for testing purposes.
- Wait for the system to start: Give the HVAC system a few minutes to start up and begin distributing air through the flexible ductwork.
- Check the airflow: Inspect each vent and register in your home to ensure that there is adequate airflow. Pay attention to any areas that may have weak or no airflow, as this could indicate an issue with the flexible ductwork.
- Listen for unusual noises: While the HVAC system is running, listen for any unusual noises such as rattling or whistling. These noises could indicate a problem with the flexible ductwork or other components of the system.
If you notice any issues with the airflow or hear unusual noises, it may be necessary to further investigate and potentially clean or repair the flexible ductwork. Contacting a professional HVAC technician is recommended to address any issues that arise.
Remember, regular maintenance and cleaning of flexible air ducts is essential for optimal system performance and indoor air quality. By following the proper cleaning techniques and turning on the HVAC system after cleaning, you can ensure that your flexible ductwork is functioning efficiently and effectively.
Regular Maintenance Tips
Cleaning Flexible Ductwork: It is important to regularly clean flexible ductwork to ensure the optimal performance of your HVAC system. Over time, dust, dirt, and other contaminants can accumulate in the ducts, reducing airflow and decreasing indoor air quality. By cleaning the ducts regularly, you can improve air circulation and prevent potential health issues.
Can Flexible Ductwork be Cleaned: Yes, flexible ductwork can be cleaned. However, it is recommended to hire a professional duct cleaning company to ensure the thorough removal of dust and contaminants. They have the proper equipment and expertise to clean the ducts effectively without causing damage.
Flex Duct Cleaning: Flex duct cleaning involves the removal of dust, dirt, and other debris from the flexible ductwork. A professional duct cleaning company will use specialized tools and techniques to dislodge and remove the contaminants, improving air quality and HVAC system efficiency.
How to Clean Flexible Air Ducts: While professional duct cleaning is recommended, there are some basic steps you can follow to clean flexible air ducts yourself. Start by turning off the HVAC system and removing the vent covers. Use a vacuum cleaner or a brush to remove loose debris. Then, use a damp cloth or brush to clean the ducts from the inside. Make sure to reach as far as possible to remove all dust and dirt. Finally, replace the vent covers and turn on the HVAC system.
Can You Clean Flex Duct: Yes, you can clean flex duct. However, it is essential to use the right techniques and tools to avoid damaging the ductwork. If you are unsure or uncomfortable with cleaning the ducts yourself, it is best to hire a professional duct cleaning company.
Can Flex Duct be Cleaned: Yes, flex duct can be cleaned. Regular cleaning of flex duct is important to maintain a healthy indoor environment and prevent potential issues with the HVAC system. It is best to hire a professional duct cleaning company to ensure the thorough and proper cleaning of flex duct.
Can You Clean Flexible Ductwork: Yes, you can clean flexible ductwork. However, it is recommended to hire a professional duct cleaning company for the best results. They have the experience, knowledge, and equipment to effectively clean flexible ductwork without causing damage.
In conclusion, regular maintenance of flexible air ducts is crucial for maintaining optimal performance and indoor air quality. While you can clean the ducts yourself, it is best to hire a professional duct cleaning company for a thorough and effective cleaning. Remember to schedule regular cleaning sessions to prevent the accumulation of dust and contaminants in your flexible ductwork.
Question-Answer:
Why is it important to clean flexible air ducts?
It is important to clean flexible air ducts because over time, dust, debris, and allergens can accumulate in the ducts, which can decrease the air quality in your home and affect the efficiency of your HVAC system. Regular cleaning can help improve air flow and reduce the risk of respiratory problems.
How often should flexible air ducts be cleaned?
The frequency of cleaning flexible air ducts depends on several factors, including the level of contamination and the number of occupants in your home. In general, it is recommended to have the ducts professionally cleaned every 3 to 5 years. However, if you have pets, allergies, or live in a dusty environment, you may need to clean them more frequently.
What are the signs that indicate flexible air ducts need cleaning?
Some signs that indicate flexible air ducts need cleaning include increased dust accumulation in your home, musty or unpleasant odors coming from the vents, reduced airflow, and respiratory problems such as coughing or sneezing. If you notice these signs, it is a good idea to have your ducts inspected and cleaned if necessary.
Can I clean flexible air ducts myself?
While it is possible to clean flexible air ducts yourself, it is recommended to hire a professional for thorough cleaning. Professionals have the necessary equipment and expertise to ensure all contaminants are effectively removed from the ducts. Additionally, they can identify any potential issues or damage that may require repair.
What are the steps involved in cleaning flexible air ducts?
The steps involved in cleaning flexible air ducts include inspecting the ducts for any visible damage, sealing off the registers to prevent dust from spreading, removing the grilles or covers, using a vacuum with a brush attachment to remove loose dust and debris, and using a specialized duct cleaning tool to agitate and remove stubborn debris. The process may also involve sanitizing the ducts if necessary.
How long does it take to clean flexible air ducts?
The time it takes to clean flexible air ducts depends on various factors, such as the size of the duct system, the level of contamination, and the accessibility of the ducts. On average, it can take anywhere from 2 to 6 hours to clean the ducts. However, for larger or more complex systems, it may take longer.
What are some preventive measures to keep flexible air ducts clean?
To keep flexible air ducts clean, you can take several preventive measures. These include regularly changing the air filters, keeping the vents and registers clean and free from obstructions, sealing any leaks or gaps in the ducts, and maintaining a clean and dust-free environment in your home. Additionally, having regular HVAC maintenance can help prevent issues that could contribute to dirty ducts.