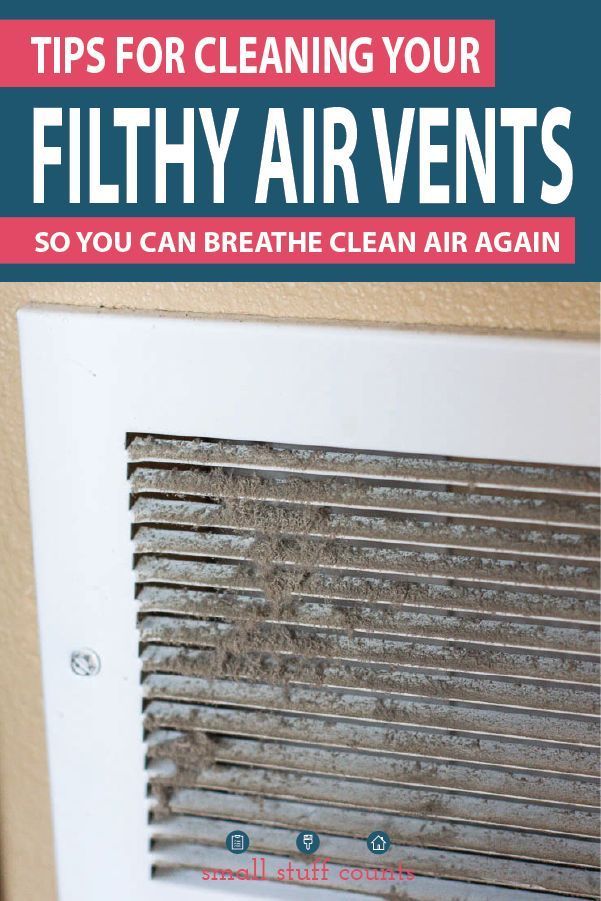
How to clean air vent covers in house
Proper maintenance of air vent covers is essential to ensure a healthy and clean indoor environment. Over time, these covers can accumulate dust, dirt, and allergens, leading to poor air quality in your home. Cleaning air vent covers is a simple task that can significantly improve the air circulation in your house.
There are several methods you can use to clean vent covers effectively. One popular approach is using a vacuum cleaner with a brush attachment. Gently run the brush over the surface of the vent cover to remove loose dust and debris. You can also use a damp cloth or sponge to wipe away any stubborn dirt.
If you live in an apartment and have air vents, cleaning them is equally important. To clean air vents in an apartment, start by turning off the HVAC system to prevent dust from circulating. Use a vacuum with a long, flexible hose to reach into the vents and remove any buildup. For a more thorough cleaning, consider using a vent cleaning brush to dislodge any trapped dirt.
Air return vents, which circulate air back to the HVAC system, can also become dirty over time. To clean air return vents, start by removing the vent cover. You can use a brush or vacuum to remove any debris from the cover and the opening. For a deeper clean, you can wash the vent cover with mild soap and warm water and let it dry before reattaching.
Cleaning AC vents in the ceiling requires extra care and attention. Use a ladder or step stool to reach the vents safely. You can remove the vent covers and wash them in warm soapy water. For a more thorough cleaning, consider using a small brush to clean the individual louvers. Remember to let the vents dry completely before reattaching them.
When it comes to maintaining clean air vent covers, consistency is key. Develop a regular cleaning routine to keep them free from dust and dirt. It is also advisable to clean ceiling vents, wall heater vents, and return air vents periodically to ensure efficient air circulation throughout your home.
By following these simple cleaning methods, you can ensure that your air vent covers remain clean and free from allergens. Clean air vents not only improve the air quality in your house but also help your HVAC system operate more efficiently. “How often should air conditioning ducts be cleaned?”
Understanding Air Vent Covers
Air vent covers are an important part of any heating, ventilation, and air conditioning (HVAC) system. They help direct and control the airflow throughout your home, ensuring that each room receives the proper amount of heating or cooling.
Over time, air vent covers can become dirty and clogged with dust, debris, and other pollutants. This can restrict airflow and decrease the efficiency of your HVAC system. To maintain a clean and healthy indoor environment, it’s important to know how to clean air vent covers.
How to Clean Air Vent Grills
Cleaning air vent grills is a simple process that can be done with a few basic household items. Here’s what you’ll need:
- A screwdriver (if necessary to remove the vent cover)
- A vacuum with brush attachment
- A microfiber cloth or sponge
- Mild detergent or cleaning solution
- Warm water
- Start by turning off your HVAC system to prevent dust and debris from being circulated.
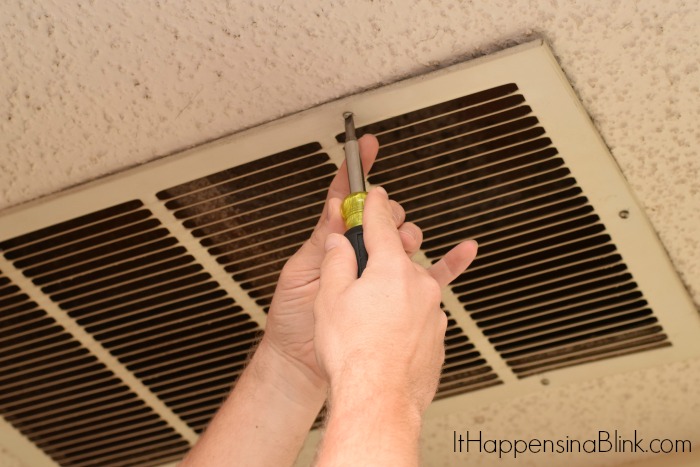
- If the vent cover is held in place by screws, use a screwdriver to loosen and remove them. Otherwise, gently pull the cover away from the wall or ceiling.
- Use the vacuum with a brush attachment to remove loose dirt, dust, and debris from the vent cover. Pay special attention to the louvers or slats.
- Fill a basin or sink with warm water and a small amount of mild detergent or cleaning solution.
- Dip the microfiber cloth or sponge into the soapy water and wring out any excess liquid.
- Gently scrub the vent cover, making sure to clean both the front and back surfaces.
- Rinse the vent cover thoroughly with clean water and pat dry with a clean cloth or towel.
- If necessary, reinstall the vent cover by tightening the screws or pressing it back into place.
- Turn on your HVAC system and enjoy the improved airflow and cleanliness of your air vent grills.
How to Clean Return Air Vents
Cleaning return air vents is similar to cleaning air vent grills. However, they may be larger and have a different design. Here’s how to clean return air vents:
- Turn off your HVAC system to prevent the circulation of dust and debris.
- Remove the vent cover by unscrewing it or pulling it away from the wall or ceiling.
- Use a vacuum with a brush attachment to remove loose dirt, dust, and debris from the vent cover.
- Fill a basin or sink with warm water and a small amount of mild detergent or cleaning solution.
- Dip a microfiber cloth or sponge into the soapy water and wring out any excess liquid.
- Gently scrub the vent cover, paying attention to any crevices or intricate designs.
- Rinse the vent cover thoroughly with clean water and pat dry with a clean cloth or towel.
- Reinstall the vent cover by tightening the screws or pressing it back into place.
- Turn on your HVAC system and enjoy the improved airflow and cleanliness of your return air vents.
Cleaning air vent covers is an essential part of maintaining a clean and efficient HVAC system. By regularly cleaning and maintaining your air vent covers, you can improve the air quality in your home and ensure that your HVAC system operates at its best.
The Need for Regular Cleaning
Cleaning air vent covers in your house is an essential task that should be performed regularly. Over time, these covers accumulate dust, dirt, pet hair, and other particles, which can negatively impact the quality of air in your home and the overall performance of your HVAC system. Therefore, it is important to clean them to maintain good indoor air quality and ensure the efficient functioning of your ventilation system.
Here are some reasons why regular cleaning of air vent covers is necessary:
- Improved Indoor Air Quality: Clean air vent covers prevent the circulation of dust, allergens, and other harmful particles throughout your home. By regularly cleaning these covers, you can significantly improve the indoor air quality and reduce the risk of allergies, respiratory issues, and other health problems.
- Enhanced Energy Efficiency: Dust and debris build-up on air vent covers can obstruct the airflow and reduce the efficiency of your HVAC system. When the airflow is restricted, your system needs to work harder to heat or cool your home, leading to increased energy consumption and higher utility bills. By keeping the vent covers clean, you can ensure proper airflow and optimize the energy efficiency of your heating and cooling system.
- Prevention of Mold Growth: Moisture can accumulate in air vents and promote the growth of mold and mildew. Regularly cleaning the vent covers helps to prevent mold spores from spreading and thriving inside your home. Mold growth not only affects indoor air quality but can also cause structural damage to your property.
- Extended Lifespan of HVAC System: When air vent covers are clogged with debris, it puts additional strain on your HVAC system. Over time, this can lead to wear and tear, reducing the lifespan of your equipment. By keeping the vent covers clean, you can help preserve the longevity of your HVAC system and avoid costly repairs or replacements.
Regular cleaning of air vent covers is a simple and effective task that can be performed using basic household cleaning supplies. By following the appropriate methods, such as using a vacuum, damp cloth, or mild cleaning solution, you can easily remove the dirt and maintain clean vent covers.
Overall, regular cleaning of air vent covers is crucial for maintaining good indoor air quality, promoting energy efficiency, preventing mold growth, and extending the lifespan of your HVAC system. By incorporating this cleaning task into your regular home maintenance routine, you can ensure a healthier and more comfortable living environment for you and your family.
Methods for Cleaning Air Vent Covers
Clean air vent covers are essential for maintaining good air quality in your home. Over time, dust, dirt, and other particles can accumulate on these covers, reducing their efficiency and potentially contributing to respiratory issues. Here are some simple and effective methods for cleaning air vent covers:
- How to clean air return vents: Start by turning off the HVAC system. Remove the vent cover and use a vacuum cleaner with a brush attachment to remove any loose dust and debris. Then, wash the vent cover with warm soapy water and a sponge. Rinse thoroughly and let it dry before reattaching.
- How to clean air vent covers: Use a screwdriver to remove the vent cover. Take it outside and shake off any loose dust and debris. Next, fill a bucket with warm water and a mild detergent. Use a soft brush or sponge to scrub the vent cover gently. Rinse with clean water and allow it to dry completely before reinstalling.
- Best way to clean air vent covers: If the vent cover is made of metal, you can use a mixture of equal parts vinegar and water to clean it. Apply the solution to the vent cover and gently scrub with a soft brush or sponge. Rinse with clean water and dry thoroughly before reattaching.
- How to clean vent covers in the house: Regular maintenance is key to keeping vent covers clean. Use a vacuum cleaner with a brush attachment or a duster to remove dust and dirt from the surface regularly. If necessary, follow the above methods for a deeper clean.
- How to clean air vent grills: Start by removing the vent grill from the wall or ceiling. Vacuum the grill with a brush attachment to remove loose dust and debris. For a more thorough clean, submerge the vent grill in warm soapy water and scrub gently with a sponge or soft brush. Rinse well and let it dry completely before reinstalling.
- How to clean ceiling vents: Turn off the HVAC system before cleaning ceiling vents. Use a step ladder to reach the vent cover, and carefully remove it. Clean the vent cover using one of the methods mentioned above, depending on the type of material. Once clean, reinstall the vent cover securely.
- How to clean wall heater vents: Start by turning off the heater. Use a screwdriver to remove the vent cover from the wall. Use a vacuum cleaner with a brush attachment to remove loose dust and debris. Clean the vent cover using warm soapy water and a brush or sponge. Rinse thoroughly and allow it to dry completely before reattaching.
- How to clean return air vents: Remove the vent cover and vacuum any loose dust and debris. Wash the vent cover with warm soapy water and a sponge. Rinse well and let it dry completely before reattaching.
- How to clean air vents in an apartment: Follow the same cleaning methods mentioned above, depending on the type of vent cover. If you are unsure how to remove the vent cover, consult with the building maintenance staff or landlord for guidance.
Regularly cleaning your air vent covers will help improve indoor air quality and ensure the efficiency of your HVAC system. Remember to turn off the HVAC system before removing any vent covers, and always follow safety precautions when working at heights or with electrical equipment.
Method 1: Vacuuming
Cleaning air vent covers is an important task to maintain good air quality in your house. One of the best ways to clean air vent covers is by using a vacuum cleaner. Vacuuming not only helps to remove dust and debris from the covers but also improves the overall efficiency of the ventilation system. Here are some steps on how to clean air vent covers using a vacuum cleaner:
- Inspect the vent covers: Before starting the cleaning process, it is important to inspect the vent covers for any signs of damage or loose parts. Make sure they are securely attached to the vents.
- Prepare the vacuum cleaner: Attach the brush attachment to the vacuum cleaner. This attachment is specifically designed for cleaning delicate surfaces like air vent covers.
- Switch on the vacuum cleaner: Turn on the vacuum cleaner and adjust the suction power to a medium or low setting.
- Vacuum the vent covers: Starting from one end, slowly run the brush attachment of the vacuum cleaner over the surface of the vent covers. Make sure to cover every nook and cranny to remove all the dust and debris.
- Pay attention to the corners: Use the crevice tool attachment of the vacuum cleaner to clean hard-to-reach corners and edges of the vent covers.
- Repeat if necessary: Depending on the level of dirt and dust, you may need to repeat the process multiple times. Be thorough to ensure all the debris is removed.
By vacuuming your air vent covers regularly, you can keep them clean and free from dust and allergens. This method is simple, effective, and doesn’t require any additional cleaning agents or tools. Remember to follow proper safety precautions and consult a professional if you encounter any issues with your ventilation system.
Method 2: Dusting with Microfiber Cloth
Another effective way to clean air vent covers is by using a microfiber cloth. Microfiber cloths are ideal for dusting as they attract and hold onto dust particles, making them an excellent tool for cleaning vents.
Here is a step-by-step guide on how to clean air vent covers with a microfiber cloth:
- Gather your supplies: For this method, you will need a microfiber cloth, a vacuum cleaner with a brush attachment, and a step ladder or stool if needed.
- Turn off the HVAC system: Before cleaning, it’s important to turn off your heating, ventilation, and air conditioning (HVAC) system to prevent any dust or debris from being circulated.
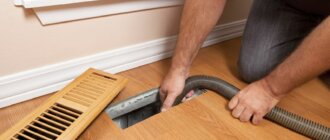
- Remove the vent covers: Carefully remove the vent covers from the wall, ceiling, or floor. Most vent covers can be easily removed by unscrewing them or gently pulling them off.
- Vacuum the vent covers: Use a vacuum cleaner with a brush attachment to remove any loose debris, dust, or cobwebs from the vent covers. Start at the top and work your way down, making sure to vacuum both the front and back sides of the cover.
- Dust with a microfiber cloth: Take a clean microfiber cloth and gently wipe the surface of the vent cover. Use sweeping motions to capture and remove any remaining dust or particles. Pay attention to the corners and crevices where dust tends to accumulate.
- Clean hard-to-reach areas: If there are any hard-to-reach areas or stubborn dust buildup, use a soft-bristle brush or a cotton swab dampened with water to clean those spots. Be careful not to apply excessive pressure or moisture.
- Reinstall the vent covers: Once the covers are clean and dry, reattach them to their original positions. Make sure they are securely fastened.
Cleaning your air vent covers with a microfiber cloth is a quick and easy way to maintain clean and healthy indoor air quality. It’s recommended to clean your vent covers at least once every few months, or more frequently if you notice excessive dust buildup.
Method 3: Using a Steam Cleaner
If you’re looking for an effective and efficient way to clean air vent covers in your house, using a steam cleaner can be a great option. Steam cleaners are powerful tools that use high temperatures and pressure to remove dirt, dust, and grime from various surfaces.
Here’s how you can clean your air vent covers using a steam cleaner:
- Gather the necessary materials: a steam cleaner, a clean microfiber cloth, and a small brush or toothbrush.
- Prepare the steam cleaner according to the manufacturer’s instructions. Make sure it is filled with water and heated up to the appropriate temperature.
- Turn off your HVAC system to avoid any air circulation while cleaning the vent covers.
- Place a clean microfiber cloth below the air vent cover to catch any dirt or moisture that falls during the cleaning process.
- Using the steam cleaner, start from the top of the vent cover and work your way down. Hold the steam cleaner about an inch away from the surface and move it slowly across the vent cover. The steam and pressure will help loosen and lift the dirt and debris.
- If there are any stubborn stains or grime, use a small brush or toothbrush to gently scrub the affected areas.
- Once you have steamed and scrubbed the entire vent cover, wipe away any excess moisture with the clean microfiber cloth.
- Allow the vent cover to dry completely before turning your HVAC system back on.
Additional Tips:
- Before using a steam cleaner, make sure to check if your air vent covers are suitable for steam cleaning. Some covers may be made of materials that are not compatible with high heat or moisture.
- If you’re unsure about using a steam cleaner on your vent covers, you can test it on a small and inconspicuous area first to see how the material reacts.
- If the vent covers are painted, be careful not to use too much pressure or heat to avoid damaging the paint.
- Regularly cleaning your air vent covers can improve the air quality in your home and help prevent the buildup of dirt and allergens.
Using a steam cleaner is an effective method to clean air vent covers in your house. It helps to remove dirt, dust, and grime efficiently, leaving your vent covers looking clean and fresh.
Method 4: Soaking in Warm Soapy Water
One effective method to clean air vent covers in your house is by soaking them in warm soapy water. This method is particularly useful for removing stubborn dirt, grime, and grease buildup on the vent covers. Here’s how to do it:
- Start by removing the vent covers from the air vents. Refer to the manufacturer’s instructions if needed.
- Fill a sink or a basin with warm water. Make sure the water is not too hot to avoid damaging the vent covers.
- Add a few drops of mild dish soap to the warm water. Mix it gently to create a soapy solution.
- Submerge the vent covers in the warm soapy water. Ensure they are fully covered.
- Allow the vent covers to soak for about 15-20 minutes. This will help loosen the dirt and grime.
- After soaking, use a soft-bristle brush or a sponge to gently scrub the vent covers. Pay attention to any stubborn stains or buildup.
- Rinse the vent covers thoroughly with clean water to remove any soap residue.
- Inspect the vent covers to ensure they are clean. If necessary, repeat the soaking and scrubbing process.
- Once the vent covers are clean, dry them completely using a clean towel or let them air dry.
- Finally, reinstall the clean vent covers back onto the air vents.
This method is suitable for cleaning various types of vent covers, including metal, plastic, or painted ones. However, it may not be ideal for certain delicate materials, so make sure to check the manufacturer’s recommendations before using this method.
By regularly cleaning your air vent covers using this method, you can ensure better air quality and improve the overall efficiency of your HVAC system.
Method 5: Scrubbing with a Soft Brush
If you’re looking for a simple and effective way to clean air vent covers in your house, scrubbing with a soft brush can be a great option. This method is particularly useful for removing dust, dirt, and debris that has accumulated on the surface of the vent covers.
Here’s how you can clean air vent covers using this method:
- Start by removing the vent covers from the wall or ceiling. This can usually be done by unscrewing the fasteners or gently pulling them off.
- Once the vent covers are removed, use a soft brush with bristles that will not scratch or damage the surface. A small paintbrush or a toothbrush can work well for this purpose.
- Hold the vent cover over a sink or a garbage bin to catch any loose dirt or debris that may fall off during the cleaning process.
- Gently scrub the surface of the vent cover using the soft brush. Be sure to pay attention to all the corners and crevices, as these areas tend to accumulate more dirt and dust.
- If necessary, you can also dampen the brush with water or a mild cleaning solution to help remove more stubborn stains or grime.
- Once you’ve finished scrubbing, rinse the vent cover with water to remove any remaining dirt or cleaning solution.
- Dry the vent cover thoroughly before reinstalling it. You can use a clean cloth or paper towel to remove excess moisture and allow it to air dry completely.
- Finally, place the clean vent cover back onto the wall or ceiling and secure it with the fasteners.
By following these steps, you can easily clean air vent covers in your house using a soft brush. This method is not only effective but also gentle enough to avoid causing any damage to the vent covers. Make sure to clean your vents regularly to maintain good air quality in your home.
Method 6: Cleaning with Vinegar Solution
To clean air vent covers in your house, you can use a vinegar solution. This method is particularly effective for removing dirt, dust, and grime from metal vent covers.
Here’s how you can clean air vent covers with a vinegar solution:
- Mix equal parts white vinegar and water in a bucket or spray bottle.
- Remove the air vent cover from the wall or ceiling. You may need a screwdriver to do this.
- Place the vent cover in the vinegar solution and let it soak for about 15-20 minutes. This will help loosen any dirt or debris stuck on the cover.
- After soaking, use a soft brush or cloth to scrub away the dirt. You can also use an old toothbrush for hard-to-reach areas.
- Rinse the vent cover with clean water to remove any remaining vinegar solution.
- Dry the vent cover thoroughly before reattaching it to the wall or ceiling.
Additional tips:
- If the vent cover is heavily soiled, you can let it soak in the vinegar solution for a longer period.
- You can also add a few drops of dish soap to the vinegar solution for added cleaning power.
- For stubborn stains or buildup, you can scrub the vent cover with a paste made of baking soda and water.
- Make sure to clean both sides of the vent cover to ensure thorough cleaning.
By using this vinegar solution method, you can effectively clean your air vent covers and improve the air quality in your house.
Method 7: Applying Baking Soda Paste
To clean air vent covers in your house, you can use a simple and effective method of applying a baking soda paste. This method is suitable for various types of air vents, including ceiling vents, metal air vent covers, return air vents, and wall heater vents.
- Gather your supplies:
- Baking soda
- Water
- A bowl
- A soft brush or toothbrush
- A cloth or sponge
- Create a baking soda paste:
- Remove the vent cover:
- Apply the baking soda paste:
- Scrub the vent cover:
- Rinse and wipe:
- Dry and reassemble:
- Repeat if necessary:
In a bowl, mix equal parts of baking soda and water to create a thick paste. The paste should be spreadable but not too runny.
Using a screwdriver or the appropriate tools, carefully remove the vent cover from the wall or ceiling.
Using the soft brush or toothbrush, apply the baking soda paste onto the vent cover. Make sure to cover all areas, including the grills and crevices.
Gently scrub the vent cover with the brush or toothbrush, focusing on any dirty or stained areas. The baking soda paste will help to loosen and remove dirt, dust, and grime.
Once you’ve scrubbed the vent cover, rinse it with water to remove the baking soda paste. Use a cloth or sponge to wipe away any residue.
Allow the vent cover to air dry completely before reassembling it back onto the wall or ceiling.
If the vent cover is still dirty or stained, you can repeat this process until it is clean.
By applying a baking soda paste, you can effectively clean your air vent covers in the house. This method is affordable, non-toxic, and easy to do. It will help maintain good air quality and ensure that air can flow freely through your vents.
Method 8: Using Dish Soap and Water
If you’re looking for a simple and effective way to clean air vent covers in your house, using dish soap and water is a great option. This method is particularly useful for cleaning metal air vent covers.
Here’s how you can clean your air vent covers using dish soap and water:
- Mix a solution of warm water and a few drops of dish soap in a bucket or sink.
- Remove the air vent cover from the wall or ceiling. This can usually be done by unscrewing it.
- Place the air vent cover in the bucket or sink with the dish soap and water solution.
- Let the vent cover soak in the solution for about 10-15 minutes to loosen any dirt and grime.
- Using a soft brush or sponge, gently scrub the vent cover to remove any remaining dirt and grime. Be sure to scrub all sides of the cover, including the edges and corners.
- Rinse the vent cover thoroughly with clean water to remove any soap residue.
- Pat the vent cover dry with a clean towel.
- Before reinstalling the vent cover, make sure the vent opening is clean as well. You can use a vacuum cleaner with a brush attachment or a damp cloth to clean the area around the vent opening.
- Finally, reinstall the clean air vent cover by screwing it back into place.
Using dish soap and water is a safe and effective way to clean air vent covers in your house. It helps remove dirt, dust, and grime, leaving your vent covers looking clean and fresh.
Remember to clean your air vent covers regularly to maintain good air quality in your home.
Method 9: Removing Grime with Toothbrush
If you’re looking for a simple yet effective way to clean your air vent covers, using a toothbrush can be a great option. This method works well for removing grime and dust buildup on the surfaces of the vent covers. Here’s how you can do it:
- Start by removing the air vent cover from the wall or ceiling. It’s important to clean the vent cover separately to ensure a thorough cleaning.
- Fill a bucket or sink with warm water and add a small amount of mild dish soap.
- Dip a toothbrush into the soapy water and gently scrub the vent cover. Pay attention to the corners, edges, and any grooves where dust and grime may accumulate.
- If there are stubborn stains or buildup, you can add some baking soda to the toothbrush and continue scrubbing. Baking soda has natural cleaning properties and can help remove tough grime.
- Rinse the vent cover under running water to remove any remaining soap or baking soda residue.
- Place the clean vent cover on a towel or drying rack and allow it to air dry completely before reinstalling it.
This method can be used to clean various types of air vent covers, including those found in apartments, wall heaters, return air vents, and air return vents. It is also suitable for cleaning both floor and ceiling vents. However, it’s important to note that this method may not be suitable for cleaning metal or delicate vent covers.
By regularly cleaning your air vent covers, you can ensure that the air circulating in your home is clean and free from dust and allergens. It is recommended to clean your vent covers at least once every few months or as needed, depending on your home’s air quality.
Tips for Effective Cleaning
When it comes to cleaning your air vent covers, it’s important to use the best methods and techniques to ensure that they are thoroughly cleaned. Here are some tips to help you clean your air vent covers effectively:
- Start by removing the vent covers from the wall or ceiling. This will allow for easier access to clean all parts of the cover.
- If your vent covers are made of metal, use a soft cloth or sponge and warm soapy water to gently clean them. Avoid using abrasive cleaners as they may scratch the surface.
- For wall heater vents, it’s important to turn off the heater before cleaning. Use a vacuum cleaner with a brush attachment or a soft cloth to remove any dust or debris from the vents.
- If your air vent covers have grills, use a small brush or toothbrush to remove any dirt or dust that has accumulated on the grills. Be gentle to avoid damaging the grills.
- To clean air vent covers in your house, you can also use a damp cloth or a microfiber cloth to wipe them down. This will help remove any dust or dirt that may be stuck on the surface.
- Ceiling vents can be cleaned with a vacuum cleaner or a duster with a long handle. Make sure to remove any dust or debris that may have settled on the vents.
- Don’t forget to clean the air return vents as well. These vents are responsible for circulating air back to the HVAC system. Use a vacuum cleaner or a damp cloth to clean them.
- In apartments, it’s important to clean air vents regularly to maintain good air quality. Follow the same cleaning methods mentioned above to ensure that the vent covers are clean.
- For return air vents, you can use a vacuum cleaner with a brush attachment or a duster with a long handle to remove any dust or debris.
- Once you have cleaned the air vent covers, make sure to dry them thoroughly before putting them back in place. This will prevent any moisture from causing mold or mildew to develop.
By following these tips, you can effectively clean your air vent covers and improve the air quality in your home.
Tip 1: Removing Vent Covers Properly
When it comes to properly cleaning air vent covers, the first step is to remove them from your apartment or house. Regular maintenance is important to ensure clean and fresh air circulating your living space. Follow these steps to remove vent covers without causing any damage:
- Turn off the heating or cooling system. Before starting the cleaning process, ensure that your heating or cooling system is turned off. This will prevent any dust or debris from being blown around while you clean.
- Locate the vent covers. Depending on your apartment or house layout, you may have vent covers in various rooms, such as the kitchen, bathroom, or living room. Find the vent covers that need cleaning.
- Prepare the necessary tools. To remove the vent covers, you will need a screwdriver, a vacuum cleaner with a brush attachment, a microfiber cloth, and warm soapy water.
- Use a screwdriver to loosen the screws. Carefully unscrew the screws that hold the vent cover in place. Keep the screws in a safe place, so you don’t lose them.
- Gently pull the vent cover away from the wall or ceiling. Once the screws are removed, pull the vent cover away from the wall or ceiling. Be gentle to avoid any damage.
- Inspect the vent cover. Take a close look at the vent cover and determine the extent of dust and dirt buildup. This will help you determine the cleaning method and products needed.
Remember, removing vent covers properly is essential to avoid any damage. Once the vent covers are removed, you can proceed to clean them thoroughly using the appropriate methods based on the material and level of dirt. Regular cleaning of air vent covers will ensure clean and healthy air in your apartment or house.
Tip 2: Cleaning Both Sides of the Covers
When it comes to maintaining clean air vent covers in your house, it’s crucial to clean both sides of the covers. This ensures that the vents function optimally and keeps the air in your home clean and fresh. Here’s how you can effectively clean both sides of the covers:
- Gather the necessary cleaning supplies: Before starting the cleaning process, make sure you have all the supplies you need. This may include a vacuum cleaner with a brush attachment, a microfiber cloth, mild soap or detergent, warm water, and a soft-bristle brush.
- Remove the vent covers: Start by carefully removing the vent covers. Depending on the type of air vents you have, you may need to unscrew or unclip them from the wall or ceiling.
- Vacuum the covers: Use a vacuum cleaner with a brush attachment to gently remove any loose dust and debris from both sides of the vent covers. Make sure to reach the corners and edges as well.
- Wash the covers: Fill a basin or sink with warm water and add a few drops of mild soap or detergent. Place the vent covers in the soapy water and use a soft-bristle brush to scrub away any dirt or grime. Rinse the covers thoroughly with clean water.
- Dry the covers: After washing, pat the vent covers dry with a clean microfiber cloth. Ensure that they are completely dry before reattaching them to the wall or ceiling.
- Clean the vents: While the covers are drying, take the opportunity to clean the vents themselves. Use a vacuum cleaner or a duster to remove any dust or debris from the inside of the vents. You can also use a soft-bristle brush to gently scrub any stubborn dirt.
- Reattach the covers: Once everything is clean and dry, carefully reattach the vent covers to their original position. Make sure they are secure and flush against the wall or ceiling.
Cleaning both sides of the air vent covers is essential to maintain proper airflow and prevent the buildup of dust and allergens. By following these simple steps, you can ensure that your vents remain clean and efficient, providing you with healthy air quality in your home.
Tip 3: Drying the Covers Thoroughly
After cleaning the air vent covers, it is important to ensure that they are thoroughly dried before putting them back in place. This will prevent the growth of mold and mildew, and also help maintain the effectiveness of the cleaning process.
Here are some simple steps to follow for drying the covers:
- Remove excess moisture: Use a clean cloth or paper towel to remove any excess moisture from the surface of the covers. Press the cloth gently against the covers to soak up the moisture.
- Air dry: Place the covers in a well-ventilated area and allow them to air dry completely. This can take anywhere from a few hours to overnight, depending on the level of humidity in your environment.
- Flip the covers: Once one side of the covers is dry, flip them over to allow the other side to dry as well. This will ensure that both sides are thoroughly dried.
- Check for moisture: Before reinstalling the covers, make sure they are completely dry. Check for any signs of moisture or dampness, as these can indicate that the covers need more time to dry.
It’s important to note that some covers may have removable parts, such as filters, that also need to be dried separately. Follow the manufacturer’s instructions for removing and drying these parts.
By following these drying steps, you can ensure that your air vent covers are clean, dry, and ready to be put back in place. This will help maintain good indoor air quality and ensure the proper functioning of your HVAC system.
Tip 4: Using a Protective Sealant
When it comes to cleaning air vent covers in your house, using a protective sealant can be a great way to ensure that they stay clean and in good condition for longer periods.
Using a protective sealant on your air vent covers can help prevent dust, dirt, and other particles from sticking to the surface. It creates a barrier that makes it easier to clean and maintain the covers. Here’s how you can use a protective sealant:
- Clean the vent covers: Before applying a protective sealant, it is essential to clean the vent covers thoroughly. Use a vacuum cleaner or a soft brush to remove any dust or debris on the surface. You can also wipe them down with a damp cloth to ensure they are free from any dirt.
- Choose the right sealant: Look for a sealant specifically designed for air vent covers. There are various types available, including sprays, liquid sealants, and gels. Read the instructions and choose the one that suits your needs and preferences.
- Apply the sealant: Follow the instructions provided with the sealant to apply it correctly. In most cases, you will need to spray or brush on a thin, even layer of the sealant onto the vent covers. Ensure that the entire surface is covered, including the corners and edges.
- Let it dry: Allow the sealant to dry completely before reinstalling the vent covers. This may take a few hours or overnight, depending on the specific sealant you are using. Make sure the area is well-ventilated during the drying process.
- Regular maintenance: Even with a protective sealant, regular maintenance is still necessary. Clean the vent covers periodically to remove any accumulated dust or dirt. You can use a vacuum cleaner, a soft cloth, or a brush to gently clean the surface. Avoid using harsh chemicals or abrasive materials that may damage the sealant.
Using a protective sealant on your air vent covers can significantly extend their lifespan and keep them looking clean and fresh. It is a simple and effective method to ensure that your house has clean and well-maintained air vents.
Tip 5: Regular Maintenance Routine
To ensure clean and healthy air in your home, it is important to establish a regular maintenance routine for cleaning the air vent covers. By following these simple steps, you can keep your air vents clean and free from dust and other debris.
1. Start by turning off the HVAC system to avoid any accidents or damage. If you are unsure how to do this, consult the user manual or contact a professional.
2. Remove the vent covers carefully by unscrewing or unclipping them from the wall or ceiling. Make sure to place them on a clean and flat surface.
3. Use a vacuum cleaner with a brush attachment or a soft cloth to remove any loose dust and debris from the vent covers. Be gentle to avoid damaging the covers.
4. Fill a bucket or sink with warm water and a mild detergent. Submerge the vent covers in the soapy water, ensuring that they are completely covered. Let them soak for about 10-15 minutes.
5. Use a soft brush or sponge to scrub away any stubborn dirt or grime from the vent covers. Pay extra attention to the corners and crevices where dust tends to accumulate.
6. Rinse the vent covers thoroughly with clean water to remove any soap residue. Make sure to remove all the suds for a spotless finish.
7. Dry the vent covers completely using a clean towel or allow them to air dry naturally before reinstalling them. Ensure that they are completely dry to prevent the growth of mold or mildew.
8. While the vent covers are drying, take the opportunity to clean the air ducts themselves. Using a vacuum cleaner with a long hose attachment, carefully remove any dust or debris that may have accumulated inside.
9. Once the vent covers are dry, reinstall them in their original position. Ensure that they fit snugly and securely.
10. Finally, remember to establish a regular cleaning routine for your vent covers. Depending on the air quality in your home and the amount of dust and debris present, you may need to clean them every few months or more frequently if necessary.
A regular maintenance routine will not only keep your air vent covers clean and functioning properly but also ensure the circulation of clean and healthy air throughout your home.
Question-Answer:
What are some simple methods to clean air vent covers?
Some simple methods to clean air vent covers include using a vacuum cleaner with a brush attachment, wiping them with a damp cloth, or using a mixture of warm water and mild detergent.
Is it necessary to clean air vent covers regularly?
Yes, it is necessary to clean air vent covers regularly to ensure proper air flow and prevent the accumulation of dust and allergens.
Can I remove the air vent covers to clean them?
Yes, you can remove the air vent covers to clean them more thoroughly. Just be careful not to damage them in the process.
How often should I clean my air vent covers?
The frequency of cleaning air vent covers depends on factors such as the level of dust in your home, the presence of pets, and the quality of your air filters. In general, it is recommended to clean them at least once every three to six months.
What should I do if my air vent covers are stained or have stubborn dirt?
If your air vent covers are stained or have stubborn dirt, you can try using a mild abrasive cleaner or a mixture of baking soda and water. Apply the cleaner, let it sit for a few minutes, and then scrub gently with a soft brush or sponge.