DIY duct cleaning
Are you tired of paying for professional duct cleaning services? Do you want to save money and take matters into your own hands? If so, then it’s time to consider do-it-yourself duct cleaning. Cleaning air ducts yourself is a cost-effective way to ensure that your home’s ventilation system is free from dust, debris, and allergens.
Wondering how to clean your own air ducts? The process may seem daunting, but with the right knowledge and tools, it’s easier than you think. HVAC duct cleaning DIY is a straightforward task that can be completed in a few simple steps. By following our step-by-step guide, you’ll learn how to clean your air ducts like a pro without breaking the bank.
Before you begin your DIY AC duct cleaning project, it’s essential to gather the necessary equipment. Having the right tools on hand will make the process much smoother. DIY duct cleaning requires a few key items, such as air duct cleaning tools, sanitizing products, and protective gear. With these items in tow, you’ll be well-prepared to tackle the task at hand.
Once you have your equipment ready, it’s time to dive into the DIY air duct cleaning process. First, start by inspecting your air ducts for any visible dirt, dust, or debris. Dust accumulation is often concentrated near the vents and intake areas. Using a vacuum cleaner with a brush attachment, gently remove any loose dirt and debris from these areas.
Next, it’s time to focus on deep cleaning your air ducts. This involves using air duct cleaning tools, such as a rotary brush or duct cleaning robot, to dislodge stubborn dirt and debris from the ducts’ inner surfaces. Be sure to follow the manufacturer’s instructions when using these tools to ensure optimal cleaning results.
After completing the cleaning process, don’t forget to sanitize your air ducts. DIY air duct sanitizing is an important step to eliminate any lingering bacteria, mold, or odors. Choose a sanitizing product specifically designed for HVAC systems, and apply it according to the manufacturer’s instructions.
By following these steps, you’ll be able to achieve clean air ducts DIY style. You can enjoy improved air quality, reduced allergens, and increased energy efficiency in your home without the expense of hiring professional duct cleaning services. With a little time and effort, you can take control of your home’s ventilation system and breathe easy.
Remember, learning how to clean your air ducts yourself is an essential skill for any homeowner. With the right tools, knowledge, and motivation, you can keep your air ducts clean and functional for years to come. So why wait? Get started on your DIY duct cleaning journey today! “How often should air conditioning ducts be cleaned?”
DIY Duct Cleaning: A Step-by-Step Guide to Cleaning Your Air Ducts
If you’re looking to improve the air quality in your home and save some money, cleaning your air ducts yourself can be a great option. With a few tools and some patience, you can effectively clean your ductwork and ensure your HVAC system is running efficiently. Here is a step-by-step guide to help you get started.
- Gather the necessary tools: Before you begin, make sure you have the following tools on hand:
- Duct cleaning brushes
- Vacuum cleaner with a hose attachment
- Screwdriver
- Rags or towels
- Broom or mop
- Turn off the HVAC system: To ensure your safety, turn off the HVAC system before you start cleaning. This will prevent any accidental injury or damage to the system.
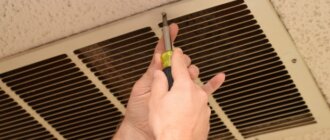
- Remove vent covers: Use a screwdriver to remove the vent covers from the walls or ceilings. Set them aside in a safe place.
- Clean the vent covers: Use a damp cloth or rag to wipe down the vent covers and remove any dust or dirt. If they are particularly dirty, you can soak them in warm soapy water and scrub them clean.
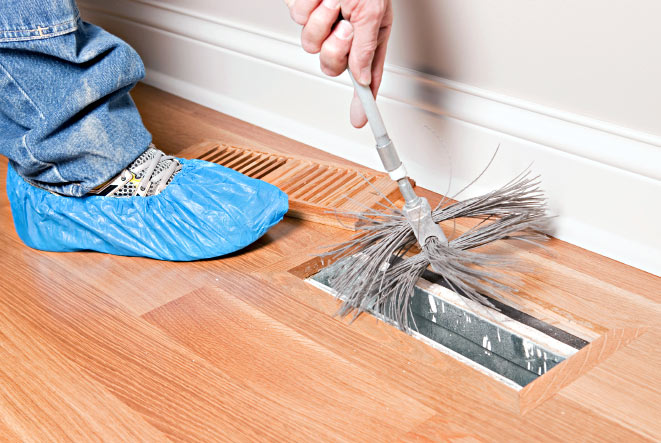
- Attach the brush to the vacuum: Slide the brush attachment onto the hose of your vacuum cleaner. This will allow you to clean the ducts while simultaneously sucking up the dirt and debris.
- Clean the main ducts: Insert the brush into the main ducts and move it back and forth to dislodge any dust or debris. As you clean, turn on the vacuum cleaner to suck up the loosened dirt. Repeat this process for each main duct in your home.
- Clean the vent ducts: Attach a smaller brush attachment to the vacuum hose and use it to clean the vent ducts. These are the smaller ducts that branch off from the main ducts and lead to each vent. Be thorough and make sure to clean each vent duct.
- Clean the vent registers: Finally, use a damp cloth or rag to clean the vent registers. These are the grates that cover the openings of the vent ducts. Make sure to remove any dust or dirt that has accumulated on them.
- Replace the vent covers: Once all the cleaning is done, securely replace the vent covers onto the walls or ceilings. Make sure they are properly aligned and screwed in.
- Turn on the HVAC system: After you have finished cleaning and replacing the vent covers, you can turn the HVAC system back on.
That’s it! With these simple steps, you can clean your air ducts yourself and enjoy improved air quality in your home. Regularly cleaning your ductwork can also help to extend the life of your HVAC system and save you money on energy bills. Remember, if the task seems too daunting or you’re unsure about any steps, it’s always best to contact a professional HVAC technician to perform the cleaning for you.
Importance of Regular Air Duct Cleaning
Regular air duct cleaning is an essential step in maintaining a clean and healthy indoor environment. DIY cleaning of air ducts is a cost-effective option that can be easily done with proper knowledge and the right tools. By removing buildup and contaminants from your air ducts, you can improve the air quality in your home and prevent potential health problems.
HVAC duct cleaning DIY projects are becoming increasingly popular as homeowners are realizing the benefits of clean air ducts. DIY air duct cleaning allows you to save money by avoiding the high costs associated with professional services.
Cleaning air ducts yourself not only helps to improve the quality of the air you breathe but also extends the lifespan of your HVAC system. When dirt and debris accumulate in your air ducts, it can cause your HVAC system to work harder, leading to higher energy bills and potential damage to the system.
If you’re wondering how to clean air ducts in a house DIY style, here are some steps to get you started:
- Gather the necessary DIY air duct cleaning tools, including a vacuum cleaner with a brush attachment, screwdrivers, and a damp cloth.
- Turn off your HVAC system to prevent the spread of dust and debris during the cleaning process.
- Remove the vent covers and clean them separately using a damp cloth or by soaking them in warm, soapy water.
- Use the vacuum cleaner with the brush attachment to remove loose debris and dust from the air ducts. Be thorough and make sure to reach all corners and bends.
- If necessary, use a screwdriver to remove any access panels in the ductwork to access hard-to-reach areas.
- Clean the inside of the air ducts by wiping them down with a damp cloth or using a brush attachment on your vacuum cleaner.
- Replace the vent covers and turn on your HVAC system.
Regular DIY duct cleaning not only helps to maintain clean air ducts but also promotes better airflow throughout your home. It reduces the chances of blockages and improves the efficiency of your HVAC system, saving you money on energy bills in the long run.
It’s important to note that while DIY vent cleaning can be effective, there are some situations where professional help may be necessary. If you have mold growth, severe contamination, or suspect asbestos in your air ducts, it’s best to consult with a professional HVAC technician to ensure safe and proper cleaning.
To sum up, regular cleaning of your air ducts is crucial for maintaining a healthy living environment. DIY air duct cleaning is a cost-effective option that can be done with the right tools and knowledge. By keeping your air ducts clean, you can enjoy better indoor air quality, extend the life of your HVAC system, and save money on energy bills.
Signs That Your Air Ducts Need Cleaning
Regularly cleaning your air ducts is an important part of maintaining a healthy and efficient HVAC system. While it is recommended to have a professional duct cleaning every few years, there are some signs that indicate your air ducts may need cleaning before that time.
1. Excessive Dust
If you notice an excessive amount of dust building up on your furniture or floating in the air, it could be a sign that your air ducts need cleaning. Dirty air ducts can distribute dust throughout your home, causing allergies and respiratory issues.
2. Mold or Mildew
If you smell a musty odor or see mold growth around your air vents, it is a clear indication that your air ducts need cleaning. Mold and mildew in the ductwork can spread spores throughout your home, leading to health problems.
3. Increased Energy Bills
If you notice a sudden increase in your energy bills without any other explanation, it could be a sign that your air ducts are dirty. When your ducts are clogged with dust and debris, your HVAC system has to work harder to maintain a comfortable temperature, resulting in higher energy consumption.
4. Reduced Airflow
If you feel like the airflow from your vents is weak or inconsistent, it may be due to clogged air ducts. Dirt and debris can accumulate in the ducts over time, obstructing the airflow and diminishing the overall efficiency of your HVAC system.
5. Pest Infestation
If you notice signs of pest activity, such as droppings, nests, or dead insects in or around your air vents, it is crucial to clean your ducts. Pests can enter your ductwork and contaminate the air you breathe, posing health risks to you and your family.
6. Allergies or Respiratory Issues
If you or your family members are experiencing frequent allergies, unexplained respiratory issues, or worsened asthma symptoms, it could be a result of dirty air ducts. Pollutants, allergens, and particles can accumulate in the ductwork and circulate throughout your home, affecting indoor air quality.
By recognizing these signs, you can determine if it’s time to clean your air ducts. If you decide to clean your air ducts yourself, there are various tools and equipment available for DIY duct cleaning. However, it’s important to ensure you have proper knowledge and follow safety guidelines to avoid damaging your ductwork or causing any harm to yourself or your HVAC system.
Benefits of DIY Duct Cleaning
DIY duct cleaning, or do-it-yourself duct cleaning, is a cost-effective and efficient way to clean the air ducts in your home. By learning how to clean AC ducts yourself, you can save money on professional services and maintain better air quality in your living space. Here are some of the benefits of DIY duct cleaning:
- Cost Savings: Hiring a professional duct cleaning service can be expensive. By performing the task yourself, you can save a significant amount of money.
- Convenience: DIY duct cleaning allows you to choose a time that suits you best. You don’t have to wait for an appointment or rely on someone else to do the work for you.
- Improved Air Quality: Cleaning air ducts yourself can help remove dust, debris, and allergens that may be circulating in your home. This can lead to improved indoor air quality and reduce the risk of respiratory issues.
- Enhanced Energy Efficiency: Clean air ducts can improve the efficiency of your HVAC system, helping it run more smoothly and reducing energy consumption.
- Extended Lifespan of Equipment: Regular DIY duct cleaning can help prevent the buildup of dirt and debris in your HVAC system, which can extend the lifespan of your equipment and reduce the need for costly repairs or replacements.
When it comes to DIY duct cleaning, it’s essential to follow proper procedures and use the right tools to ensure effective cleaning. By learning how to clean your own air ducts, you can enjoy these benefits and maintain a cleaner and healthier living environment.
Tools and Equipment You’ll Need
If you’re considering cleaning your air ducts yourself, you’ll need a few tools and equipment to get the job done properly. Here’s a list of items you’ll need:
- Vent covers: These help in keeping the cleaning process efficient by blocking the flow of dirt and debris into the rest of your home.
- Duct brushes: Brushes are used to scrub the inner surfaces of the ducts and remove dust, dirt, and other contaminants. Choose brushes with long handles to reach deeper into the ductwork.
- Vacuum cleaner with a HEPA filter: This is an essential tool to suck up loose debris and contaminants while cleaning the air ducts. HEPA filters trap small particles and prevent them from being released back into the air.
- Screwdriver or socket wrench: These tools will be necessary to remove the vent covers and access the duct openings.
- Microfiber cloths: These are useful for wiping down the vent covers and removing any dust or dirt that may have accumulated on them.
- Cleaning solution: You can use a mild detergent or an air duct cleaning solution to clean the vent covers and other surfaces.
- Protective gear: It’s important to protect yourself while cleaning the air ducts. Wear gloves, safety goggles, and a dust mask to avoid direct contact with dust and debris.
- Drop cloths: Lay down drop cloths or plastic sheets to protect your floors and furniture from any falling debris or spilled cleaning solution.
With these tools and equipment, you’ll be well-equipped to clean your air ducts effectively and efficiently. Remember to follow proper safety precautions and guidelines when performing DIY duct cleaning.
Preparing Your Home for Duct Cleaning
Before you begin the process of cleaning your air ducts, it’s important to properly prepare your home. Preparing your home will ensure that the cleaning process is efficient and effective. Here are some steps to follow:
- Turn off the HVAC system: Before you start cleaning your air ducts, make sure to turn off your heating, ventilation, and air conditioning (HVAC) system. This will prevent any debris or dust from being spread throughout your home during the cleaning process.
- Gather the necessary tools: To clean your air ducts, you’ll need a few basic tools. Some common tools include a screwdriver, a vacuum cleaner with a hose attachment, a brush, and a flashlight. Having these tools on hand will make the cleaning process easier.
- Remove obstructions: Take the time to remove any furniture, rugs, or other items that might obstruct access to your air ducts. Clearing the area around the ducts will make it easier to clean and ensure that no dust or debris gets trapped beneath objects.
- Seal off vents and registers: Before you start cleaning, seal off any vents or registers that are not part of the duct you are currently cleaning. This will prevent debris from entering other areas of your home. You can use plastic bags or covers to seal off the vents.
- Protect your home: Consider using plastic sheets or tarps to cover nearby furniture or objects. This will help protect them from any dust or debris that may be released during the cleaning process.
- Follow safety precautions: When cleaning your air ducts, it’s important to prioritize safety. Make sure to wear protective gear such as gloves, goggles, and a mask to prevent any exposure to dust or allergens. Additionally, be cautious when working on ladders or in tight spaces.
By following these steps and properly preparing your home, you’ll ensure that your DIY air duct cleaning process goes smoothly and efficiently. Preparing your home for duct cleaning is an important step towards cleaner and healthier air in your household.
How to Access Your Air Ducts
To begin the process of DIY duct cleaning, you first need to access your air ducts. Follow these steps to access your air ducts easily:
- Turn Off Your HVAC System: Before you start accessing your air ducts, make sure to turn off your HVAC system. This will help prevent any airflow or debris disturbance during the cleaning process.
- Locate the Air Vent Covers: Air vent covers are usually located on the walls or ceilings of your home. Use a screwdriver to remove the screws that hold the vent covers in place. Carefully lift and detach the covers to reveal the air duct openings.
- Prepare Your Tools: Gather the necessary tools for cleaning air ducts yourself. This may include a vacuum cleaner with a long hose attachment, a brush or duster, a microfiber cloth, and a flashlight. Additionally, ensure you have a ladder or step stool if your air ducts are located at a higher level.
- Inspect the Air Ducts: Use a flashlight to inspect the condition of your air ducts before cleaning them. Look for any visible dirt, dust, or debris accumulation, as well as signs of mold or mildew. Make a note of any problem areas that may require extra attention during the cleaning process.
- Clean the Air Ducts: Using a vacuum cleaner with a long hose attachment, carefully clean the interior of the air ducts. Start from one end and work your way to the other, ensuring that you cover the entire length of each duct. Pay special attention to corners, bends, and areas with visible dirt or debris. Use a brush or duster to remove stubborn dirt or dust from the duct walls. You can also use a microfiber cloth to wipe down the vent covers.
- Sanitize the Air Ducts (Optional): If desired, you can also sanitize your air ducts after cleaning them. There are DIY air duct sanitizing products available in the market that can help eliminate bacteria, mold, and unpleasant odors.
- Replace the Air Vent Covers: Once you have finished cleaning and sanitizing (if desired), place the air vent covers back in their original position. Secure them with the screws you removed earlier.
- Turn On Your HVAC System: Finally, turn your HVAC system back on and ensure that it is functioning properly. Check for any unusual sounds or smells that may indicate a problem.
Remember, if you are not comfortable performing DIY duct cleaning or if you notice any severe issues during the inspection, it is always best to consult a professional HVAC duct cleaning service. Proper maintenance and cleaning of your air ducts can help improve the indoor air quality in your home and promote better overall health.
Removing and Cleaning Air Vent Covers
As part of your DIY duct cleaning process, it’s important to remove and clean air vent covers. These covers can accumulate dust, dirt, and other debris over time, which can affect the airflow and the quality of the air in your home. Here’s a step-by-step guide on how to remove and clean air vent covers:
- Turn off your HVAC system: Before removing any air vent covers, make sure to turn off your heating, ventilation, and air conditioning (HVAC) system. This will prevent any debris from being blown into your home.
- Inspect the vent covers: Take a close look at each vent cover to determine the type of fasteners used to secure them. Most vent covers are either held in place with screws or simply snapped on.
- Remove the screws: If your vent covers are attached with screws, use a screwdriver to remove them. Place the screws in a safe location so that you don’t lose them.
- Unsnap the covers: For covers that are snapped on, use your fingers or a flat-headed screwdriver to gently pry them off. Start at one corner and work your way around the cover until it comes off.
- Clean the covers: Once the vent covers are removed, it’s time to clean them. Fill a sink or bucket with warm water and a mild detergent. Use a soft cloth or sponge to scrub away any dirt and grime. Rinse the covers thoroughly and set them aside to dry.
- Clean the vents: While the covers are drying, take the opportunity to clean the vents themselves. Use a vacuum cleaner with a brush attachment to remove any loose debris. You can also use a damp cloth or a long-handled brush to reach further into the vents and remove any remaining dust.
- Reinstall the vent covers: Once both the covers and vents are clean and dry, it’s time to reinstall the vent covers. If you removed screws, line up the cover with the vent opening and secure it back in place by tightening the screws. If the covers snap on, align them with the vent opening and firmly press them until they snap into place.
Cleaning air vent covers is an important step in the DIY duct cleaning process. By removing and cleaning these covers, you can improve the overall efficiency of your HVAC system and ensure better air quality in your home.
Using a Vacuum to Remove Dust and Debris
One of the most effective ways to clean your air ducts yourself is by using a vacuum. This method allows you to remove dust, dirt, and debris from the ductwork, improving the air quality in your home. Here’s how you can do it:
- Gather the necessary tools: Before you start cleaning, make sure you have the right tools on hand. You will need a heavy-duty vacuum cleaner with a long hose and brush attachments. Additionally, consider using a screwdriver, a flashlight, and a damp cloth for wiping down registers and vents.
- Turn off the HVAC system: To ensure your safety and prevent the spread of dust in your home, turn off the heating, ventilation, and air conditioning (HVAC) system before you begin cleaning.
- Remove the vent covers: Use a screwdriver to remove the screws holding the vent covers in place. Once removed, set them aside so you can clean them later.
- Inspect the ductwork: Use a flashlight to inspect the ductwork for any visible signs of dust, dirt, or debris. Pay special attention to areas around bends, joints, and connections.
- Attach the brush attachment: Attach the brush attachment to the vacuum hose. This will help loosen any dust or debris that may be stuck to the walls of the ducts.
- Start vacuuming: Slowly insert the vacuum hose into the ductwork and start vacuuming. Move the hose back and forth to ensure thorough cleaning. Pay extra attention to areas where you noticed dust or debris during your inspection.
- Clean the vent covers: While the ducts are being vacuumed, take the time to clean the vent covers using a damp cloth. This will help remove any dust or dirt that may have accumulated on the surface.
- Continue cleaning: Move from one duct to another, repeating the vacuuming process until all ducts in your home have been cleaned.
- Replace the vent covers: Once you have finished cleaning the ducts, secure the vent covers back in place using the screws.
- Turn on the HVAC system: Finally, turn on the HVAC system and enjoy the improved air quality in your home.
By following these steps and using a vacuum to clean your air ducts, you can effectively remove dust and debris, improving the efficiency of your HVAC system and the overall air quality in your home.
Cleaning Air Ducts with a Brush
If you’re wondering how to clean your air ducts yourself, using a brush can be an effective method. While professional duct cleaning services use specialized equipment, you can achieve satisfactory results with some DIY efforts. Here’s a step-by-step guide on how to clean your own air ducts using a brush:
- Gather the necessary tools: Before you begin, you’ll need a few tools. These include a brush specifically designed for cleaning air ducts, a screwdriver, a vacuum cleaner with a hose attachment, and a face mask to protect yourself from dust and debris.
- Turn off the HVAC system: Start by turning off your heating, ventilation, and air conditioning (HVAC) system. This will prevent any dust or debris from circulating while you clean.
- Remove the vent covers: Use a screwdriver to remove the vent covers from the air ducts. Set them aside for cleaning later.
- Brush the ducts: Take the brush designed for cleaning air ducts and gently scrub the inside of the ducts. Start at one end and work your way to the other, making sure to reach all corners and crevices. This will help dislodge any dust or debris that may have accumulated.
- Vacuum the dust: After brushing the ducts, use a vacuum cleaner with a hose attachment to suck up the dislodged dust and debris. Make sure to thoroughly clean all the areas you brushed.
- Clean the vent covers: While the ducts are being vacuumed, take the vent covers you removed earlier and clean them. Use a damp cloth or sponge to wipe away any dust or dirt. If necessary, you can also wash the covers with mild soap and water.
- Reinstall the vent covers: Once the ducts and vent covers are clean and dry, reinstall the vent covers by screwing them back into place.
- Turn on the HVAC system: Finally, turn your HVAC system back on and enjoy the benefits of clean air flowing through your newly cleaned ducts.
Remember, cleaning your own air ducts with a brush is a DIY method that can help improve the air quality in your home. However, if you have severe allergies, respiratory issues, or a large and complex duct system, it may be best to consult a professional. They have the necessary equipment and expertise to thoroughly clean your ducts.
By following these steps, you can successfully clean your air ducts yourself and contribute to a healthier and cleaner indoor environment.
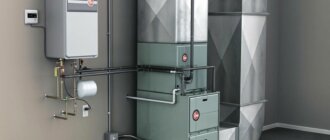
Cleaning the Blower Motor and Fan
As part of your DIY air duct cleaning project, it’s important to clean the blower motor and fan in your HVAC system. This will help ensure that clean air is circulating throughout your home. Follow these steps to clean the blower motor and fan:
- Turn off the power: Before you begin cleaning, always turn off the power to your HVAC system. This will ensure your safety and prevent any damage to the system.
- Access the blower motor: Locate the blower motor in your HVAC system. It is typically located near the air handler or furnace. Depending on your system, you may need to remove a panel to access the blower motor.
- Clean the exterior: Use a damp cloth or vacuum cleaner with a brush attachment to remove any dust and debris from the exterior of the blower motor. Be gentle to avoid damaging any components.
- Remove the blower motor: If necessary, use a screwdriver or wrench to remove any screws or bolts securing the blower motor in place. Carefully disconnect any wires or connectors attached to the motor.
- Clean the blower motor: Use a soft brush or compressed air to gently clean the blades of the blower motor. Be thorough but gentle to avoid bending or damaging the blades. Remove any accumulated dust or debris.
- Clean the fan: Locate the fan blade, which is typically attached to the blower motor. Use a soft brush or compressed air to remove any dust and debris from the fan blade. Be careful not to bend or damage the blades.
- Reassemble and test: Once the blower motor and fan are clean, reassemble the components, making sure all wires and connectors are securely attached. Turn on the power to your HVAC system and test the blower motor and fan to ensure they are functioning properly.
By cleaning the blower motor and fan as part of your DIY air duct cleaning project, you can help improve the air quality in your home and ensure the efficient operation of your HVAC system.
Sanitizing and Deodorizing Your Air Ducts
After you have completed the process of cleaning your air ducts, it is important to take the extra step of sanitizing and deodorizing them. This will help eliminate any remaining bacteria, mold, or unpleasant odors that may be lingering in your ductwork. Here are some simple DIY steps you can follow to sanitize and deodorize your air ducts:
- Prepare a sanitizing solution by mixing equal parts water and white vinegar in a spray bottle. The vinegar will act as a natural disinfectant.
- Spray the solution generously throughout the air ducts, making sure to cover all surfaces. This will help kill any remaining bacteria or mold.
- Allow the solution to sit in the ductwork for at least 15 minutes to effectively sanitize.
- Next, mix a deodorizing solution by combining a few drops of essential oil (such as lavender or eucalyptus) with water in another spray bottle.
- Spray the deodorizing solution into the air ducts, ensuring thorough coverage. The essential oils will help neutralize any lingering odors.
- Allow the deodorizing solution to sit for a few minutes to freshen up the air ducts.
In addition to sanitizing and deodorizing, you can also consider using HVAC filters or air purifiers to improve the air quality in your home. These devices can help capture and remove airborne pollutants, allergens, and unpleasant odors.
Remember to regularly clean your air ducts to maintain a healthy and efficient HVAC system. By following these DIY steps, you can ensure that your air ducts are clean, sanitized, and free from any unpleasant odors.
Cleaning Air Filters and Grilles
Regularly cleaning air filters and grilles is an essential step in maintaining clean air ducts in your home. Dirty filters and grilles can restrict airflow and allow dust and allergens to circulate throughout your space. Follow these steps to effectively clean your air filters and grilles:
- Gather your supplies: Before starting, make sure you have the following items:
- Disposable gloves
- Vacuum cleaner with brush attachment
- Mild detergent or dish soap
- Bucket or sink
- Clean cloth or sponge
- Water
- Turn off the HVAC system: Before removing the filters and grilles, turn off your HVAC system to prevent any debris from entering the ductwork.
- Remove the filters and grilles: Locate the air filters and grilles in your home. Depending on your HVAC system, the filters may be located in the return air vents, while the grilles are usually found on the supply vents.
- Clean the filters:
- For disposable filters: If your filters are disposable, simply replace them with new ones. Dispose of the old filters according to local regulations.
- For reusable filters: If your filters are reusable, start by vacuuming both sides of the filter with a brush attachment to remove loose debris.
- Prepare a mixture of mild detergent or dish soap and water in a bucket or sink. Submerge the filter in the soapy water and gently scrub it with a clean cloth or sponge to remove any remaining dirt or dust.
- Rinse the filter thoroughly with clean water to remove any soap residue.
- Allow the filter to air dry completely before reinserting it back into the HVAC system.
- Clean the grilles:
- Remove the grilles from the supply vents.
- Use a vacuum cleaner with a brush attachment to remove any dust or debris from the grilles.
- If necessary, wash the grilles with a mixture of mild detergent or dish soap and water. Use a clean cloth or sponge to scrub away any dirt or stains.
- Rinse the grilles with clean water and allow them to air dry completely.
- Once the grilles are dry, reattach them to the supply vents.
Regularly cleaning your air filters and grilles will help improve the air quality in your home and ensure proper airflow in your HVAC system. By following these simple steps, you can easily maintain clean air ducts yourself and enjoy a healthier living environment.
Inspecting and Repairing Damaged Ducts
When it comes to maintaining a clean and efficient HVAC system, inspecting and repairing damaged ducts is a crucial step that should not be overlooked. Damaged ducts can lead to air leaks and decreased energy efficiency, which can ultimately result in higher utility bills. In this section, we will guide you through the process of inspecting and repairing your air ducts to ensure optimal performance and air quality.
1. Prepare for inspection
- Turn off your HVAC system to prevent any accidental operation during the inspection process.
- Gather the necessary tools, including a flashlight, ladder, screwdriver, and duct tape.
2. Locate the air ducts
- Identify the main supply and return air ducts in your home. These are usually found in the basement, attic, or crawlspace.
- Inspect each duct carefully for any visible signs of damage, such as holes, loose connections, or disconnected sections.
3. Examine the ductwork
- Shine the flashlight into the ductwork and inspect the interior for dirt, debris, or signs of mold or mildew.
- Look for any obstructions that may be blocking the airflow, such as excessive dust buildup or fallen insulation.
- Note any areas where the ducts are sagging or kinked, as these can impede the flow of air.
4. Repair the damaged ducts
- For minor damages, such as small holes or loose connections, use duct tape to seal the affected areas. Make sure to clean the surface before applying the tape for better adhesion.
- If there are larger holes or disconnected sections, you may need to use mastic sealant or metal-backed tape to provide a more secure and durable repair.
- Consider using metal screws or clamps to reinforce any loose connections and ensure a tight seal.
- If the ducts are severely damaged or deteriorated, it may be necessary to replace the affected sections entirely. Consult a professional HVAC technician for assistance in such cases.
5. Clean the ductwork
- After repairing any damaged areas, it is recommended to clean the ductwork to remove accumulated dirt, dust, and allergens.
- Use a vacuum cleaner with a long nozzle attachment or a duct cleaning brush to reach as far into the ducts as possible. Pay extra attention to the registers and vents.
- To further enhance air quality, consider using an antimicrobial spray designed for HVAC systems to eliminate any remaining mold or mildew.
6. Schedule regular inspections and maintenance
- To ensure the long-term efficiency and proper functioning of your air ducts, it is advisable to schedule regular inspections and maintenance.
- Check for any signs of damage or leaks at least once a year, and clean the ductwork as needed to maintain optimal airflow and air quality.
By inspecting and repairing damaged ducts, you can improve the performance of your HVAC system and create a healthier living environment. Remember, when in doubt or facing extensive damage, it is always best to seek professional assistance to ensure a safe and effective repair.
Reassembling and Sealing Air Ducts
Once you have completed the cleaning process, it is important to properly reassemble and seal your air ducts to ensure optimal performance and energy efficiency. Here are the steps to reassembling and sealing your air ducts:
- Gather your DIY air duct cleaning equipment: Gather all the tools and materials you used during the cleaning process, including a flashlight, screwdriver, duct tape, foil tape, and mastic sealant.
- Inspect the ductwork: Inspect the cleaned ductwork for any damages or loose connections. If you notice any, make sure to fix them before proceeding.
- Reconnect the ducts: Carefully reconnect the disassembled sections of the air ducts, ensuring that they fit snugly together. Use the appropriate fasteners, such as screws or clamps, to hold the ducts securely in place.
- Seal the connections: To prevent air leaks and improve efficiency, seal the connections between the duct sections with duct tape or foil tape. Make sure to cover the entire joint with tape, wrapping it around at least two inches on each side of the connection.
- Seal the seams: Use mastic sealant to seal any gaps or seams in the ductwork. Apply a generous amount of sealant to the area and use a paintbrush or a gloved hand to spread it evenly. Pay extra attention to areas where two duct sections come together or where there are noticeable gaps.
- Secure loose insulation: If you had to remove any insulation during the cleaning process, make sure to put it back in place and secure it properly. Insulation helps to maintain the temperature of the air inside the ducts.
- Check for air leaks: Once you have reassembled and sealed the air ducts, it is essential to check for any remaining air leaks. Turn on your HVAC system and feel around the ductwork for any noticeable airflow. If you find any leaks, seal them promptly.
By reassembling and properly sealing your air ducts, you can ensure that your DIY cleaning efforts are not in vain. Properly sealed air ducts will help improve the performance of your HVAC system, increase energy efficiency, and provide cleaner air for you and your family.
Testing the Airflow and Functionality
Before starting the DIY cleaning process for your air ducts, it is important to test the airflow and functionality of your HVAC system. This will help identify any potential issues or blockages that may need to be addressed before cleaning.
Here are a few steps to follow:
- Turn off the HVAC system: Begin by turning off your heating, ventilation, and air conditioning (HVAC) system at the thermostat to ensure safety during the testing process.
- Remove the air vent covers: Carefully remove the air vent covers from your walls or ceiling. These covers are typically held in place with screws or clips.
- Inspect the vents: Take a close look at the vents to see if there is any visible dirt, debris, or dust buildup. This can be a sign that your ducts need cleaning.
- Check for airflow: With the HVAC system turned off, place your hand or a sheet of paper near the vent opening to check for airflow. You should feel a noticeable breeze or see the paper flutter if the airflow is strong.
- Inspect the ductwork: If airflow is weak or nonexistent, visually inspect the ductwork for any obstructions, such as furniture, toys, or excessive dust accumulation. Remove any visible blockages that could be impeding airflow.
- Test the HVAC system: Turn the HVAC system back on and listen for any unusual noises or vibrations. Check each vent throughout your home to ensure that air is flowing properly.
If you notice any significant issues during this testing process, it may be necessary to consult a professional HVAC technician to assess and repair your system. However, if the airflow and functionality appear to be normal, you can proceed with the DIY duct cleaning process.
Remember to always prioritize safety when working with HVAC systems and consult professional assistance if you are unsure or uncomfortable with any part of the process.
Maintaining Clean Air Ducts
Regular maintenance of your air ducts is crucial for maintaining good indoor air quality. While professional duct cleaning services can be expensive, there are steps you can take to clean your air ducts yourself.
1. Assess the Situation: Before starting the cleaning process, it’s important to assess the condition of your air ducts. Determine whether they require a complete cleaning or just a minor touch-up.
2. Gather the Necessary Tools: To clean your air ducts, you will need some basic DIY tools. These may include a vacuum cleaner with a brush attachment, a screwdriver, a broom or brush, cleaning cloths, and a flashlight.
3. Prepare the Area: Before you begin cleaning, make sure to prepare the area around your air ducts. Clear any furniture or obstacles that might obstruct your cleaning process.
4. Turn off the HVAC System: To ensure safety and prevent any dust from spreading during the cleaning, turn off your HVAC system before starting the process.
5. Start Cleaning: Begin by removing the air duct covers and use a vacuum cleaner with a brush attachment to remove dust and debris from the ducts. You can also use a broom or brush to loosen any stubborn dirt.
6. Clean the Registers: Remove the registers or grilles and clean them thoroughly using a vacuum cleaner or by wiping them with a damp cloth. Make sure to remove any accumulated dust and dirt.
7. Clean the Return Air Vent: Locate the return air vent and clean it using a vacuum cleaner or a brush. This vent is responsible for taking in and filtering the air, so it’s important to keep it clean.
8. Check for Mold and Mildew: During the cleaning process, pay attention to any signs of mold or mildew. If you notice any, it’s recommended to contact a professional for further investigation and remediation.
9. Replace the Filters: After cleaning the air ducts, it’s crucial to replace the air filters. Clean filters will help improve air quality and prevent dust and allergens from circulating through your home.
10. Schedule Regular Maintenance: To maintain clean air ducts, it’s important to schedule regular maintenance. Follow a cleaning routine every few months or whenever you notice reduced airflow or excessive dust accumulation.
Remember, while DIY air duct cleaning can be effective, it may not be as thorough as professional services. Consider professional cleaning for a more comprehensive cleaning experience.
Common Mistakes to Avoid
When it comes to diy air vent cleaning or diy ac duct cleaning, there are a few common mistakes that you should avoid to ensure the best results. Here are some important things to keep in mind:
- Not using the right tools: One of the biggest mistakes you can make is attempting how to clean hvac ducts yourself without the proper tools. Investing in the right equipment, such as a duct cleaning brush, a high-powered vacuum, and sanitizing solution, will ensure a thorough and effective cleaning.
- Skipping the cleaning process: It’s crucial not to skip any steps in the air duct cleaning diy process. This includes disconnecting the vents, removing dust and debris, cleaning the ductwork, and sanitizing the system. Skipping any of these steps may result in inadequate cleaning or the spread of contaminants.
- Using incorrect cleaning methods: There are different cleaning methods for different types of ductwork, so it’s essential to use the appropriate method for do it yourself duct cleaning. For example, if you have flexible ducts, you’ll need to be more gentle with the cleaning process to avoid damage.
- Not protecting yourself: DIY duct cleaning can be a dusty and dirty job, so it’s important to protect yourself while how to clean your own air ducts. Make sure to wear a mask, gloves, and protective clothing to minimize exposure to allergens, dust, and other debris.
- Ignoring safety precautions: Safety should always be a top priority when attempting to how to clean your own ducts. If you’re not comfortable or familiar with working around electrical components or climbing ladders, it’s best to hire a professional to avoid any potential accidents or injuries.
Remember that while can you clean air ducts yourself, it’s essential to be cautious and thorough in your cleaning efforts. If you’re unsure or don’t have the necessary tools and knowledge, it’s always best to consult with a professional how to clean air ducts diy to ensure a safe and effective cleaning process.
When to Call a Professional for Duct Cleaning
If you have been considering diy hvac duct cleaning or how to clean ac ducts yourself, it’s important to know when it’s time to call a professional. While it is possible to clean air ducts yourself with the right tools and knowledge, there are certain situations where it is best to leave the job to the experts.
If you are unsure about the cleanliness of your ducts or if you have never attempted diy vent cleaning before, it may be wise to call a professional. They have the experience and expertise to thoroughly clean your ducts and ensure they are free from dust, dirt, and other contaminants.
In addition, if you are dealing with severe allergies, asthma, or other respiratory issues, it is recommended to hire a professional how to clean ducts diy expert. They can provide a thorough cleaning that will help improve the air quality in your home and reduce the symptoms associated with these conditions.
Furthermore, if you have a large home with multiple duct systems, it can be challenging to reach all areas with how to clean air ducts in house diy methods. A professional will have the necessary diy air duct cleaning equipment and tools to properly clean all the ducts in your home, ensuring that no areas are left untouched.
While attempting duct cleaning diy can save you money, it is important to consider the potential risks and limitations of doing it yourself. Improper cleaning techniques or failure to remove all contaminants can lead to further air quality issues or damage to your HVAC system.
In summary, it is advisable to call a professional for air duct cleaning diy if:
- You are unsure about the cleanliness of your ducts
- You have never attempted duct cleaning yourself before
- You suffer from severe allergies, asthma, or other respiratory issues
- You have a large home with multiple duct systems
By hiring a professional, you can ensure that your ducts are properly and thoroughly cleaned, resulting in improved air quality and a healthier living environment for you and your family.
Q&A:
How often should I clean my air ducts?
It is recommended to clean your air ducts every 3 to 5 years. However, if you have pets, smokers, or someone in your household with allergies or respiratory issues, cleaning them more frequently may be necessary.
Is DIY duct cleaning effective?
DIY duct cleaning can be effective to some extent, but it may not be as thorough as a professional cleaning. It can help to remove some dust and debris from the ducts, but for a more thorough cleaning, it is recommended to hire a professional.
What tools do I need for DIY duct cleaning?
For DIY duct cleaning, you will need a vacuum cleaner with a hose attachment, a brush or duster, screwdrivers, and possibly a camera or mirror to inspect hard-to-reach areas.
Can I use chemical cleaners to clean my air ducts?
It is not recommended to use chemical cleaners in your air ducts as they can leave residue and potentially harm your health. Stick to using natural cleaning solutions such as vinegar and water.
How long does DIY duct cleaning take?
The time it takes to clean your air ducts will depend on the size of your home and the complexity of your duct system. On average, DIY duct cleaning can take anywhere from 2 to 4 hours.
What are the benefits of cleaning air ducts?
Cleaning air ducts can help improve the indoor air quality in your home, reduce allergies and respiratory issues, increase the efficiency of your HVAC system, and prolong the lifespan of your equipment.