Heating not coming on
During cold winter months, a functioning heating system is essential to keep our homes warm and comfortable. However, it can be frustrating to find that your furnace is not kicking on when the temperature drops. There could be several reasons why your heat is not working in the house, but there are steps you can take to troubleshoot the issue before calling a professional.
If you notice that your heater is not working or takes a long time to come on, it is important not to panic. First, check the thermostat to make sure it is set to the desired temperature and that the batteries are not dead. If the thermostat seems to be functioning properly, you can try turning it off and then on again to reset the system. Sometimes a simple reset can solve the problem.
If resetting the thermostat doesn’t resolve the issue, you may want to check the circuit breaker or fuse box for any tripped breakers or blown fuses. A power interruption can cause the heating system to stop working. If you find any tripped breakers or blown fuses, try resetting them or replacing them, respectively.
If your heater is still not working after these initial checks, it may be time to call a professional HVAC technician. They have the expertise and tools to diagnose and fix the problem. It is more convenient for them to handle the issue, and they can provide accurate results. They will be able to identify if the heater is broken or if there is a more complex issue with the system.
In the meantime, you can try some temporary measures to keep your house warm. Layering up with blankets and wearing warm clothing can help you stay comfortable. You can also use space heaters in the rooms you spend the most time in to provide additional warmth. Just be sure to follow safety guidelines and never leave space heaters unattended.
In conclusion, if your heat goes out in the house and your heater is not working, don’t panic. Start by checking the thermostat, circuit breaker, and fuse box. If these simple steps don’t resolve the issue, it’s best to call a professional for assistance. In the meantime, take steps to stay warm and comfortable until the issue is resolved.
Solutions When Your Heating System Won’t Turn On
If your heating system isn’t turning on, it can be quite inconvenient, especially during the colder months. Here are some solutions you can try to get your heat working again:
- Check the thermostat: Make sure the thermostat is set to the desired temperature and the heating system is on. If the thermostat is not working properly, consider replacing it.
- Check the power supply: Ensure that the heating system is receiving power. Check the circuit breaker or fuse box to make sure it hasn’t tripped or blown a fuse. If it has, reset the breaker or replace the fuse.
- Inspect the pilot light or ignition system: If you have a gas heating system, make sure the pilot light is lit. If it’s not, follow the manufacturer’s instructions to relight it. For systems with electronic ignition, check for any error codes or malfunctions and consult the user manual for troubleshooting steps.
- Check the air filters: Dirty air filters can restrict airflow, causing the heating system to work inefficiently or not at all. Replace the air filters if they are dirty or clogged.
- Inspect the ductwork: Ensure that the ductwork is properly sealed and free from any obstructions. Leaks or blockages in the ducts can prevent warm air from reaching the rooms.
- Consider professional help: If you’re not comfortable troubleshooting or if the above solutions don’t work, it’s advisable to contact a professional HVAC technician. They will be able to diagnose and fix any complex issues with your heating system.
Remember, it’s important to take safety precautions when dealing with heating systems. If you’re unsure or uncomfortable with any of the steps, it’s best to consult a professional.
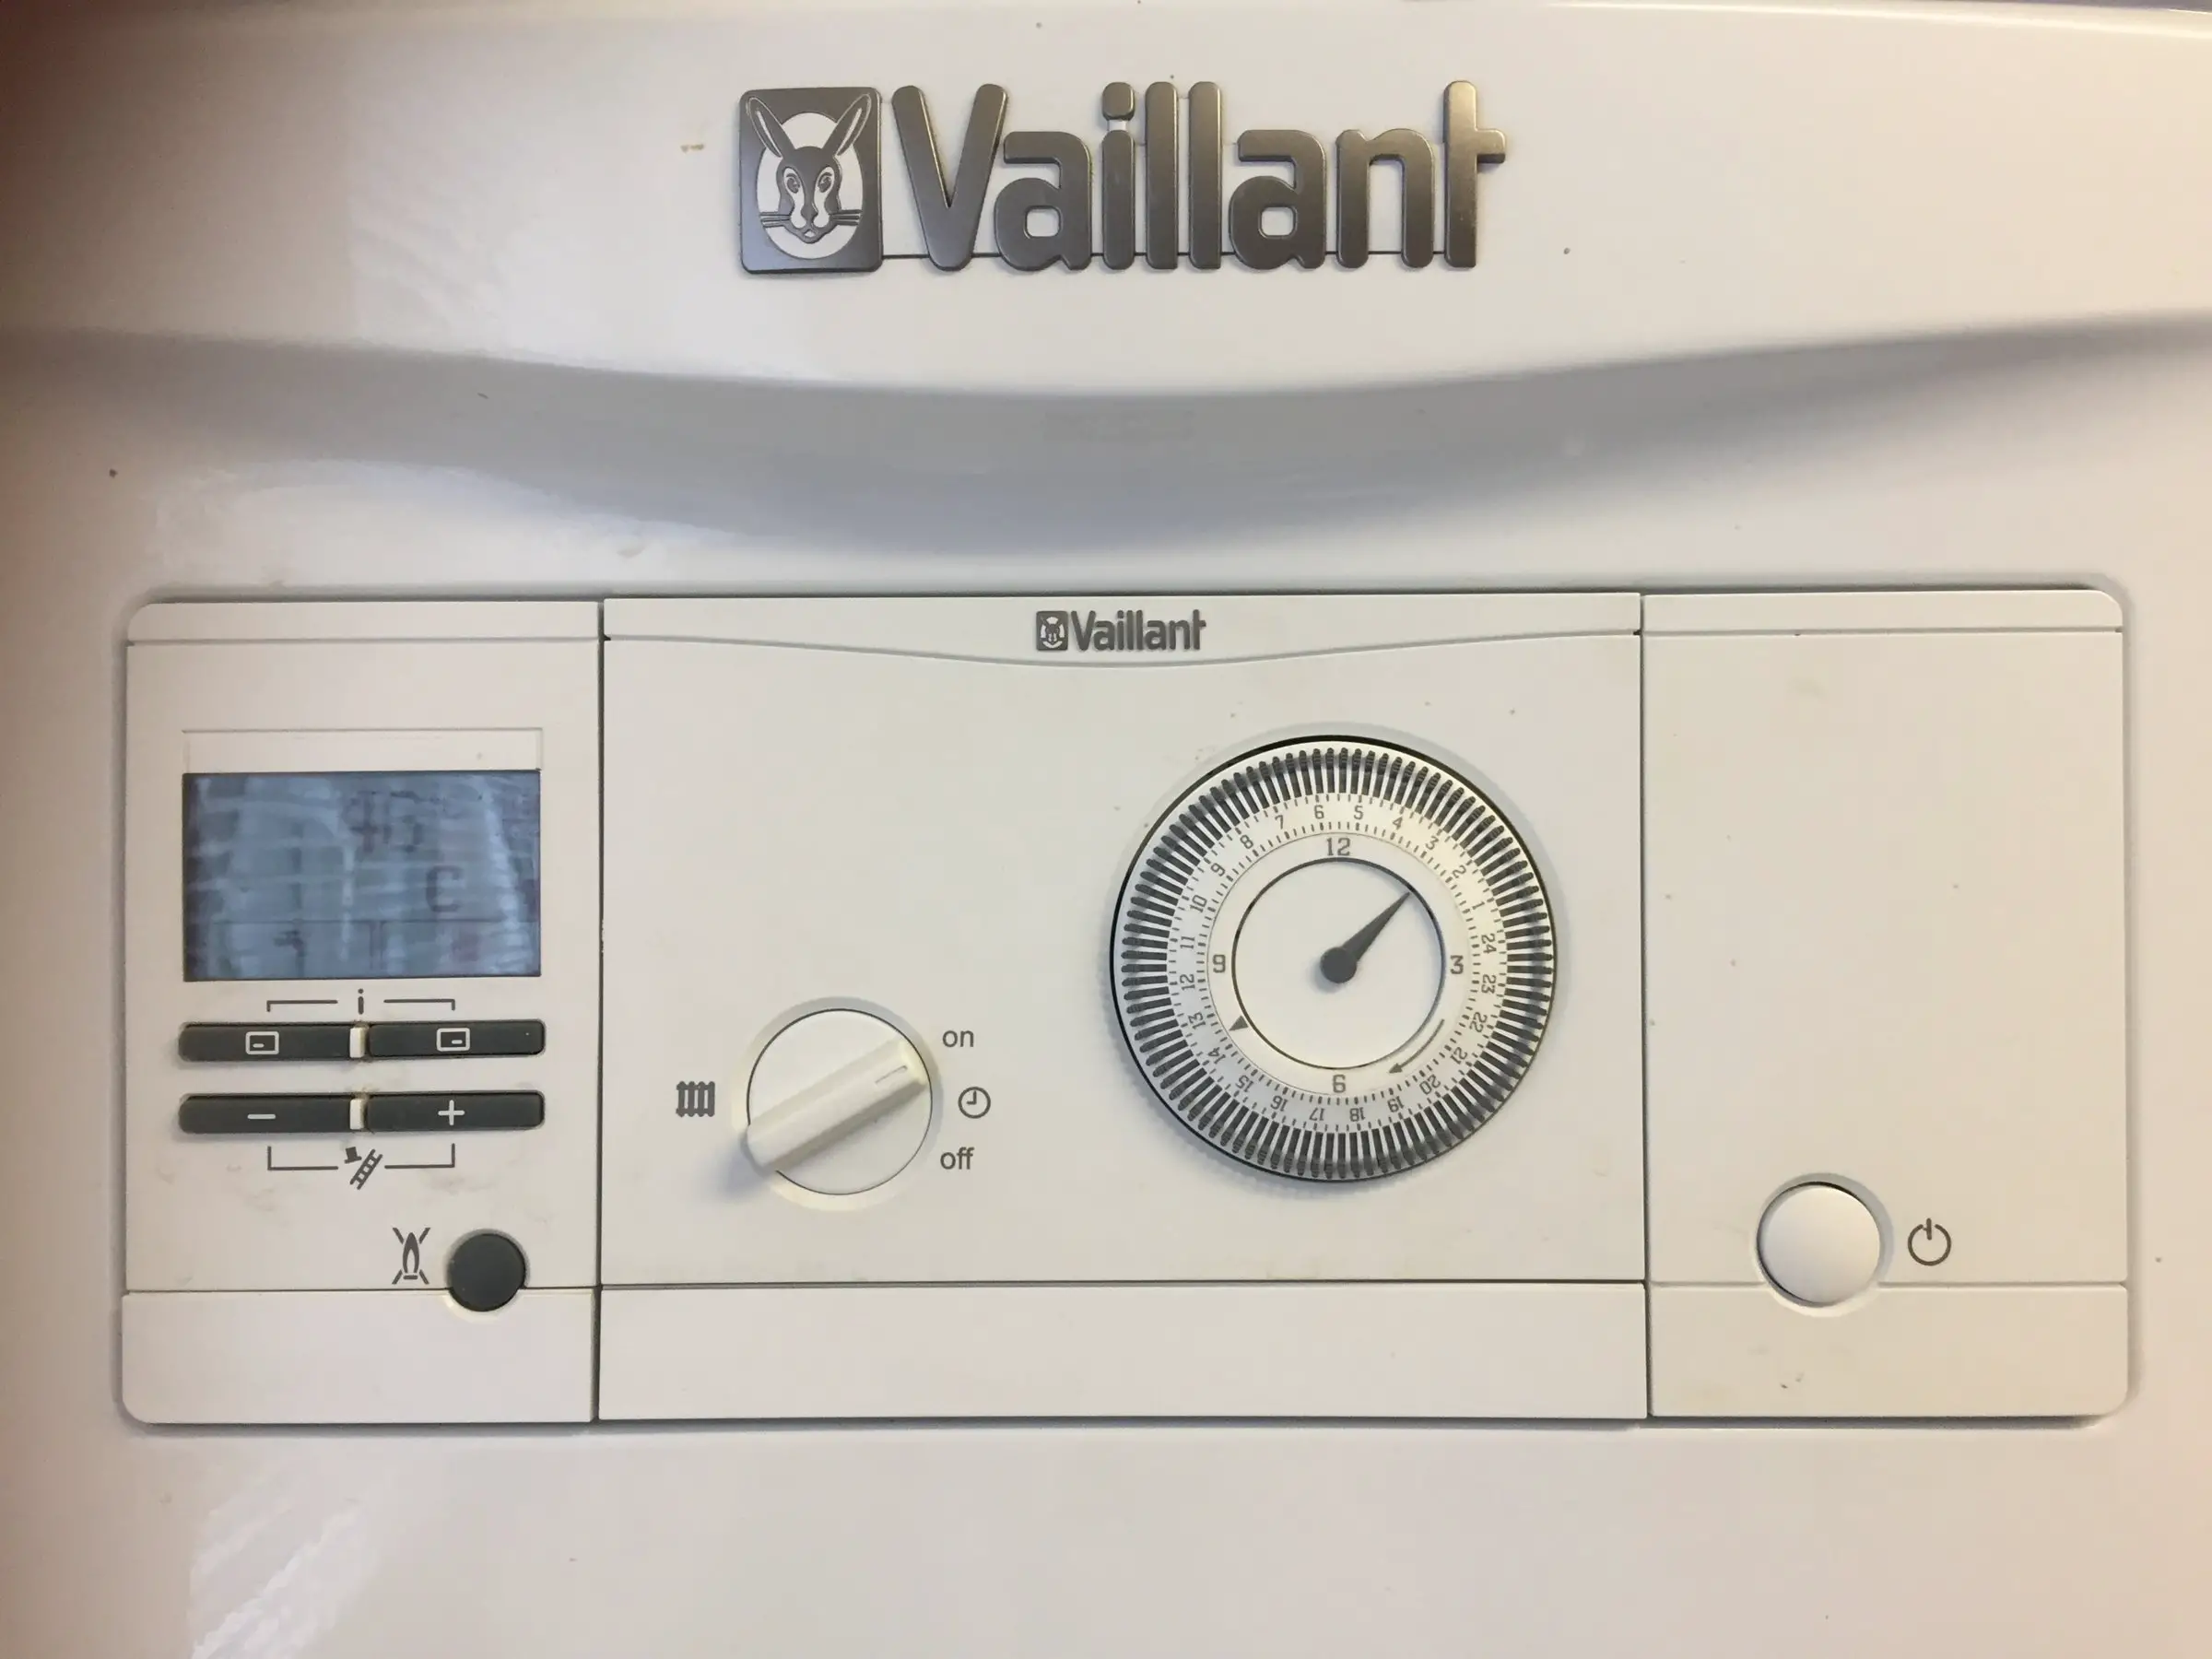
Check the Thermostat
If your heater is not turning on, the first thing you should do is check the thermostat. The thermostat is the device that controls the temperature of your heating system. It allows you to set the desired temperature and the heating system will turn on and off to maintain that temperature.
Here are a few things you can check on the thermostat:
- Check the settings: Make sure the thermostat is set to the desired temperature. Sometimes, the thermostat may have been accidentally set to a much lower temperature, which is why the house isn’t heating up.
- Make sure it is set to the heating mode: Some thermostats have different modes such as “heat” and “cool”. Make sure the thermostat is set to the heating mode.
- Check the batteries: If your thermostat is battery-powered, check the batteries. If the batteries are dead, the thermostat won’t work properly and the heater may not turn on.
- Try adjusting the temperature: Sometimes, the thermostat may not be calibrated correctly. Try adjusting the temperature setting a few degrees higher and see if the heater kicks on.
If you have checked all these things and the heater is still not working, there may be an issue with the thermostat itself. It could be broken or malfunctioning. In this case, it is best to contact a professional HVAC technician to diagnose and fix the problem.
Remember, the thermostat plays a crucial role in the functioning of your heating system. It is more convenient for you to handle and produce accurate results. So, if your house is not heating up or the heat is not working, the first step is always to check the thermostat.
Inspect the Circuit Breaker
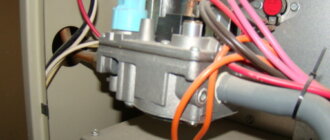
If your heating system is not turning on and you are wondering what to do if your heat stops working, one of the first things you should check is the circuit breaker. The circuit breaker is responsible for sending electricity to your heating system, and if it has tripped, it can cause your heat to stop working.“Natural gas furnace blowing cold air”
To inspect the circuit breaker, follow these steps:
- Locate the circuit breaker panel: The circuit breaker panel is usually located in the basement, utility room, or garage. It is a metal box with rows of switches or circuit breakers inside.
- Identify the breaker for your heating system: Look for a switch that is labeled with a name or description that indicates it is connected to your heating system. It may be labeled “Heating,” “Furnace,” or something similar.
- Check the position of the breaker: Look at the position of the switch. If it is in the “off” position or in the middle position, it may have tripped.
- Reset the breaker: To reset the breaker, flip it all the way to the “off” position and then back to the “on” position. You should hear a click when the breaker resets.
- Test your heating system: After resetting the breaker, test your heating system to see if it turns on. Adjust the thermostat to a temperature higher than the current room temperature and wait a few minutes to see if the heat kicks on.
- If the breaker continues to trip: If the breaker continues to trip after you reset it, it may indicate an electrical issue with your heating system. In this case, it is best to contact a professional HVAC technician to inspect and repair your system.
Inspecting the circuit breaker is a simple step you can take when your heat is broken or your furnace is not kicking on when the temperature drops. It is more convenient for you to handle and can produce accurate results in determining why your house is not heating up to temperature.
Remember, if your heater is not working, it may not necessarily be due to a broken heater. Problems with the circuit breaker can often be the culprit, causing the heat to take a long time to come on or the house to not heat up at all.
If you are experiencing issues with your heating system and the circuit breaker is not the problem, it is recommended to call a professional HVAC technician. They will be able to diagnose and fix the issue efficiently and effectively.
Examine the Pilot Light
If your heating system is not turning on, one possible cause could be that the pilot light has gone out. The pilot light is a small flame that ignites the gas in your furnace or boiler, allowing it to generate heat. If the pilot light is out, your heating system won’t be able to produce any heat.
To examine the pilot light, follow these steps:
- Locate the pilot light. In most heating systems, the pilot light is located near the bottom of the unit.
- Check if the pilot light is lit. A lit pilot light will appear as a small, steady flame. If the flame is not present, or if it is flickering or sputtering, it means the pilot light needs to be relit or adjusted.
- If the pilot light is out, carefully relight it following the manufacturer’s instructions provided in the user manual. Make sure to use the correct procedure and take all safety precautions.
- If the pilot light is lit but the heat takes a long time to come on in your house or doesn’t come on at all, the pilot light may need to be adjusted. You can try adjusting the pilot light by following the manufacturer’s instructions, but it is recommended to call a professional technician to handle this task, as it requires specialized knowledge and skills.
It’s important to note that if your heat isn’t working in your apartment or your house isn’t heating up, it may not always be due to a pilot light issue. There could be other reasons why your heat is not working, such as a broken heater or a malfunctioning thermostat. In such cases, it is recommended to contact a professional heating technician to diagnose and fix the problem.
Summary:
- Examine the pilot light if your heating system is not turning on.
- If the pilot light is not lit, relight it following the manufacturer’s instructions.
- If the pilot light is lit but the heat is not coming on or takes a long time to come on, it may need to be adjusted.
- For complex issues or if you are not comfortable handling the pilot light or heater troubleshooting, it is best to contact a professional heating technician.
Test the Ignition Switch
If the heat went out in your house and your heater is not working, one possible cause could be a faulty ignition switch. The ignition switch is responsible for starting the furnace and if it’s not working properly, it can prevent the heat from turning on in your home.
If you notice that your house is not heating up to the desired temperature or the furnace is not kicking on when the temperature drops, it is important to check the ignition switch. Here are the steps to test the ignition switch:
- Locate the ignition switch on your furnace. It is usually found near the burner assembly.
- Make sure the power to your furnace is turned off before proceeding with the test.
- Remove the access panel to expose the burner assembly and the ignition switch.
- Inspect the ignition switch for any visible signs of damage or wear.
- If the ignition switch appears to be in good condition, use a multimeter to test its functionality.
- Set the multimeter to the ohms setting.
- Attach the multimeter leads to the terminals of the ignition switch.
- If the multimeter reads zero or a very low resistance, it indicates a closed circuit and the ignition switch is functioning properly.
- If the multimeter reads infinity or a very high resistance, it indicates an open circuit and the ignition switch is faulty.
- If the ignition switch is faulty, it will need to be replaced. Contact a professional HVAC technician for assistance.
Testing the ignition switch can help determine if it is the cause of your heat not working in the house. It is more convenient for a professional technician to handle and produce accurate results while testing the ignition switch.
If the ignition switch is not the issue, there may be other reasons why your heat is not working in the house, such as a broken heater or other malfunctioning components. It is recommended to contact a professional HVAC technician to diagnose and repair the problem.
Remember, troubleshooting and repairing heating systems can be complex and potentially dangerous. It is always best to seek professional assistance to ensure the safety and effectiveness of your heating system.
Look for Fuel Supply Issues
If your house isn’t heating up and the heat is not working, there might be a problem with the fuel supply. The furnace may not be kicking on when the temperature drops, or it may take a long time for the heat to come on in the house. Here are some steps to take if you suspect a fuel supply issue:
- Check the Thermostat: Make sure the thermostat is set to the desired temperature and is in heating mode. If the thermostat is not working properly, it may not be sending the signal to the furnace to turn on.
- Inspect the Furnace: Take a look at the furnace to see if there are any obvious issues, such as a power cord that has become disconnected or a blown fuse. If you are not familiar with furnace troubleshooting, it is best to contact a professional.
- Check the Fuel Source: Ensure that the fuel source, such as gas or oil, is available and that the supply is not depleted. If you are using gas, check the gas meter to ensure that the line is not turned off.
- Inspect the Fuel Line: Look for any visible damage or leaks in the fuel line. If you notice any issues, it is important to contact a professional technician, as fuel line repairs can be dangerous.
- Consider the Fuel Delivery: If you rely on oil for heating, make sure that you have a sufficient supply of oil and that it has been delivered recently. If you are running low on oil, contact your supplier to schedule a delivery.
If you have checked all of these steps and are still experiencing issues with your heating system, it is recommended to contact a professional HVAC technician. They will have the expertise and tools to diagnose and fix the problem to get your heat working again.
Inspect the Fan Motor
If your heating system is not turning on, the problem may be with the fan motor. The fan motor is responsible for circulating air throughout the system and into your home. If it is not working properly, the heat takes a long time to come on in the house or may not come on at all.
Here are a few steps to inspect the fan motor:
- Check the power supply: Make sure the fan motor is receiving power. Check the circuit breaker or fuse box to ensure that the circuit is not tripped or the fuse is not blown. If it is, reset the circuit breaker or replace the fuse.
- Inspect the wiring: Examine the wiring connections to the fan motor. Look for any loose, damaged, or disconnected wires. If you find any issues, tighten the connections or replace the damaged wiring.
- Test the motor: Use a multimeter to test the fan motor for continuity. Set the multimeter to the resistance or ohms setting and touch the probes to the motor’s terminals. If the multimeter shows a reading of infinity or does not change, the motor may be faulty and need to be replaced.
- Check for debris: Inspect the fan motor and surrounding area for any debris or obstructions. Remove any dirt, dust, or debris that may be hindering the motor’s performance. A clogged or dirty motor can cause it to overheat and stop working.
If after inspecting the fan motor, the heat is still not working in your house, it is more convenient for me to handle and produce accurate results to contact a professional technician for further assistance. They have the knowledge and expertise to diagnose and repair any issues with your heating system.
Remember, trying to fix a broken heater on your own can be dangerous and may lead to further damage. It’s always best to leave complex repairs to the professionals.
Check the Air Filter
If your heat isn’t working, one of the first things you should do is check the air filter. A dirty or clogged air filter can cause your heater to work inefficiently or not work at all. It is more convenient for me to handle and produce accurate results, heater not working, heat went out in the house, why isn’t my heat working in my apartment, heater broken, heat takes a long time to come on in the house, what to do if the heat stops working, heat not working in the house, furnace not kicking on when the temperature drops, house isn’t heating up, house not heating up to temperature.
A dirty air filter restricts airflow, which can cause the heating system to overheat and shut off. It can also lead to poor air quality in your home. Therefore, regularly checking and replacing the air filter is an essential part of maintaining the heating system.
Here are the steps to check and replace your air filter:
- Locate the air filter in your heating system. It is usually found near the blower or in the return air duct.
- Turn off the heating system before removing the air filter to avoid any damage or injury.
- Carefully remove the old air filter from its housing.
- Inspect the air filter for dirt, dust, or debris. If it looks dirty or clogged, it needs to be replaced.
- If the air filter is dirty, purchase a new filter that matches the size and type of the old one.
- Install the new air filter by following the instructions provided. Make sure it fits securely in the housing.
- Turn on the heating system and check if it starts working properly. A clean air filter should improve the airflow and efficiency of your heater.
It is recommended to check and replace your air filter every 1-3 months, depending on the manufacturer’s instructions and the level of usage. Regular filter maintenance will not only ensure that your heating system works efficiently but also improve the air quality in your home.
If checking and replacing the air filter doesn’t solve the problem and your heat is still not working, it is best to contact a professional HVAC technician to diagnose and repair the issue.
Look for Air Duct Obstructions
If your heater is not working and your house is not heating up to the desired temperature, one possible reason could be air duct obstructions. Air ducts are responsible for delivering hot air from the heating system to different rooms in your house. If there is a blockage or obstruction in these ducts, it can prevent the heated air from reaching its destination, resulting in inadequate heating.
To determine if there are any obstructions in your air ducts, follow these steps:
- Inspect the air vents: Start by checking all the air vents in your house. Make sure they are open and unobstructed. Sometimes, furniture or objects can accidentally cover or block the vents, limiting the airflow.
- Listen for airflow: Turn on your heating system and listen for any abnormal sounds. If you do not hear the usual sound of air flowing through the vents, it could be an indication of a blockage.
- Visual inspection: Use a flashlight to inspect the air ducts. Look for visible blockages such as debris, dust, or even small animals that may have gotten stuck in the ducts. Keep in mind that some ductwork may be located in hard-to-reach areas, so you may need professional assistance.
- Check the air filter: A dirty or clogged air filter can obstruct the airflow and put strain on your heating system. Make sure to replace your air filter regularly to prevent any issues related to airflow.
If you notice any obstructions in the air ducts, you can try removing them yourself if they are easily accessible. However, if the obstructions are deeper in the ductwork or you are unsure about how to proceed, it is recommended to contact a professional HVAC technician.
Remember, troubleshooting and resolving air duct obstructions can improve the performance of your heating system and help restore the proper heating in your house. If the issue persists even after checking for obstructions, there may be other underlying problems with your heater, and it is advisable to seek professional assistance.
Inspect the Blower Belt
If your heating system is not turning on and your house is not heating up to the desired temperature, one possible reason could be a problem with the blower belt. The blower belt is responsible for connecting the blower motor to the blower wheel, which helps circulate warm air throughout your home. A malfunctioning or damaged blower belt can prevent the blower wheel from spinning properly, resulting in poor airflow and inadequate heating.
Here are some steps to inspect the blower belt in order to identify and potentially resolve the issue:
- Turn off the power: Before inspecting the blower belt, make sure to turn off the power to the heating system. This will prevent any accidents or injuries while you are working on the unit.
- Locate the blower belt: The blower belt is typically located behind the blower door or panel. Refer to the heating system’s user manual for specific instructions on accessing the blower belt.
- Check for visible signs of damage: Inspect the blower belt for any signs of wear, fraying, or cracking. If you notice any damage, it is likely that the blower belt needs to be replaced.
- Check belt tension: Gently press on the blower belt with your finger. The belt should have some tension and only give slightly when pressed. If the belt feels loose or overly tight, it may need to be adjusted or replaced.
- Check for proper alignment: Ensure that the blower belt is properly aligned with the blower motor and the blower wheel. It should be centered and not off-track or misaligned. Adjust the belt if necessary.
- Lubricate if needed: If the blower belt appears to be in good condition but still does not function properly, it may require lubrication. Consult the user manual for instructions on how to lubricate the blower belt.
If you are unsure about inspecting the blower belt or if the issue persists after inspection, it is recommended to contact a professional HVAC technician. They have the expertise and specialized tools to diagnose and repair any heating system problems. Remember, dealing with heating system issues can be complex and potentially dangerous, so it is more convenient for a professional to handle and produce accurate results.
Test the Pressure Switch
If your heating system is not turning on and the heat went out in your house, one possible issue could be a faulty pressure switch. The pressure switch is a safety device that ensures proper airflow in the system and shuts off the furnace if there is a problem. If the pressure switch is not functioning correctly, it may prevent the furnace from turning on when the temperature drops.
Here is what you can do to test the pressure switch:
- Turn off the power: Before performing any maintenance or testing, make sure to turn off the power to your heating system. This will ensure your safety during the process.
- Locate the pressure switch: The pressure switch is typically located near the blower motor in the furnace. It is a small device with wires connected to it.
- Inspect for any blockages: Examine the pressure switch and the tubing connected to it for any signs of blockages or damage. Remove any debris or obstructions that might be interfering with the switch’s operation.
- Test the switch with a multimeter: Set your multimeter to measure continuity and check the terminals of the pressure switch for electrical continuity. If there is no continuity, it indicates a faulty pressure switch that needs to be replaced.
- Check the tubing: Inspect the tubing that connects the pressure switch to the furnace for any cracks or leaks. A damaged tubing can also cause the pressure switch to malfunction.
- Consult a professional: If you are unable to identify or fix the issue with the pressure switch, it is recommended to consult a professional HVAC technician. They have the expertise and tools to diagnose and repair the problem.
Keep in mind that handling any electrical components can be dangerous, and if you are not confident in your abilities, it is best to seek professional help. Testing the pressure switch might help you identify the issue with your heating system, but it is more convenient for me to handle and produce accurate results.
Check for Ignition Problems
If you’re wondering, “why isn’t my heat working in my apartment?” or “why isn’t my heat working in my house?”, one possible culprit could be an ignition problem. When the ignition system of your heating system malfunctions, it can prevent the heat from turning on.
If your heater is not working, here are some steps you can take to check for ignition problems:
- Check the pilot light: If your heater has a pilot light, make sure it is lit. If the flame is out, follow the manufacturer’s instructions to relight it. If the pilot light won’t stay lit, it could be a sign of a larger issue that requires professional repair.
- Inspect the ignition system: Modern heating systems often use electronic ignitions instead of pilot lights. Check to see if the ignition system is functioning properly. Look for any signs of damage or corrosion. In some cases, the ignition system may need to be replaced if it is not working correctly.
- Check the thermostat: Ensure that the thermostat is set to the desired temperature and in heating mode. If the thermostat is not working correctly, it may not be sending the signal to the heating system to turn on.
- Look for error codes: Some heaters have error code displays that can provide valuable information about the issue. Consult your heater’s manual to interpret any error codes and take appropriate action.
If you’ve tried the above steps and your heat still isn’t working, it is recommended to contact a professional HVAC technician. They have the expertise and tools to diagnose and fix complex heating system problems.
Remember, when your heat goes out in the house or takes a long time to come on, it can be frustrating. However, troubleshooting the issue step by step can help you identify the problem and get your house heated up to temperature again.
Examine the Gas Valve
If your heater is broken and not turning on, one possible reason could be an issue with the gas valve. The gas valve is responsible for regulating the flow of fuel (gas) to the furnace. If the gas valve is not functioning properly, it can prevent the furnace from igniting and producing heat.
If you’re wondering, “Why isn’t my heat working in my apartment?” or “My heat went out in my house,” a malfunctioning gas valve could be the culprit. Here’s what you can do to examine the gas valve:
- Check for gas supply: Make sure the gas supply to your house or apartment is turned on. Sometimes, the gas valve may have been accidentally shut off, causing a disruption in the heating system.
- Inspect for leaks: Carefully check the gas valve and surrounding pipes for any signs of gas leaks. Look for hissing sounds, a foul odor (like rotten eggs), or any visible damage. If you suspect a gas leak, leave the area immediately and contact your gas supplier or a professional technician.
- Adjust the gas valve: In some cases, the gas valve may be slightly out of alignment or not fully open. Use caution and refer to the manufacturer’s instructions to adjust the gas valve properly. If you’re unsure or uncomfortable doing this, it’s best to call a licensed HVAC technician.
- Test the gas valve: If you have the necessary tools and knowledge, you can test the gas valve for proper functionality. Follow the manufacturer’s instructions or consult a professional technician to perform this task safely.
If you discover that the gas valve is faulty or suspect any issues, it’s recommended to contact a qualified HVAC technician. They have the expertise and specialized equipment to properly diagnose and repair gas valve problems. Trying to fix or replace the gas valve yourself without the necessary knowledge and experience can be dangerous and may cause further damage.
Remember, when your heater is not working, it is more convenient for you to handle and produce accurate results. It’s essential to address the issue promptly, especially during cold weather when your house isn’t heating up to the desired temperature. Stay warm and comfortable by ensuring your heating system is in good working condition.
Look for Tripped Limit Switch
One of the possible reasons why your heating system is not turning on and your house is not heating up to the desired temperature could be a tripped limit switch. The limit switch’s main function is to monitor the temperature in the furnace and prevent it from overheating. If it detects that the temperature has exceeded the safe limit, it shuts off the burner to prevent any potential damage.
Here are the steps you can take to check if the limit switch is tripped and what to do:
- Locate the limit switch: The limit switch is usually located near the blower compartment in the furnace. It is a small rectangular or circular device with a red reset button.
- Turn off the power: Before attempting to reset the limit switch, make sure to turn off the power to the furnace to avoid any electrical accidents.
- Reset the switch: Press the red reset button on the limit switch. If it clicks and stays in, then it was tripped and has been reset. If it doesn’t click or pops out again, it might indicate a deeper issue that requires professional assistance.
- Inspect the furnace: After resetting the limit switch, inspect the furnace for any blocked air filters, closed supply vents, or obstructed air intakes. These can cause the furnace to overheat and trip the limit switch again.
- Turn on the power: Once you have checked and resolved any issues that may have caused the limit switch to trip, you can turn the power back on to the furnace.
- Test the system: Set your thermostat to a higher temperature than the current room temperature and wait for a few minutes. If the furnace kicks on and the heat starts working in your house, then the problem was likely a tripped limit switch. If the issue persists, you may need to consult a professional HVAC technician for further diagnosis and repairs.
If your heater is not working and the house isn’t heating up, it can be frustrating, especially during cold weather. However, troubleshooting common issues like a tripped limit switch can save you time and money before calling for professional help.
Inspect the Thermostat Wiring
If your heating system is not turning on and your house is not heating up to the desired temperature, it could be due to an issue with the thermostat wiring. The thermostat is responsible for sending signals to your heating system to turn it on or off based on the temperature settings.
Here are some steps you can take to inspect the thermostat wiring:
- Check the thermostat settings: Make sure the thermostat is set to the desired temperature and the mode is set to “Heat”. If the settings are correct, move on to the next step.
- Inspect the thermostat display: Look for any error messages or symbols on the thermostat display. If you see any, consult the user manual or contact a professional HVAC technician for further guidance.
- Turn off the power: Before inspecting the thermostat wiring, turn off the power to your heating system at the circuit breaker or fuse box to prevent any electrical accidents.
- Remove the thermostat cover: Gently remove the cover of the thermostat to access the wiring behind it. Be careful not to damage the wires while doing so.
- Check for loose or disconnected wires: Inspect the wiring connections at the thermostat. Make sure all the wires are securely connected to their respective terminals. If you find any loose or disconnected wires, reconnect them properly.
- Look for damaged wiring: Examine the thermostat wiring for any signs of damage, such as frayed or chewed wires. If you spot any damaged wires, they may need to be repaired or replaced.
- Test the thermostat: If the wiring appears to be intact, you can perform a simple test to check if the thermostat is functioning properly. Set the thermostat to a higher temperature than the current room temperature and observe if the heating system kicks on. If it does, the thermostat is likely working fine.
If you are unsure about inspecting the thermostat wiring yourself or if the issue persists even after following these steps, it is recommended to seek assistance from a professional HVAC technician. They have the expertise and tools to diagnose and fix complex heating system problems.
Remember, troubleshooting and repairing heating system issues can be potentially dangerous if not done properly, so it is always safer to rely on professionals for a thorough inspection and repair.
Check the Control Board
If you have checked all the obvious reasons why your heat is not working, such as making sure the thermostat is set correctly and the power is connected, the next step is to check the control board. The control board is responsible for regulating and controlling the operations of your heating system.
Here are some steps to follow to check the control board:
- Turn off the power to your heating system before attempting any troubleshooting.
- Locate the control board. It is usually found within the furnace or air handler unit.
- Inspect the control board for any visible signs of damage or loose connections. Look for burnt spots, frayed wires, or loose components.
- If you notice any issues, such as burnt spots or loose wires, it is recommended to call a professional technician to repair or replace the control board.
- If there are no visible signs of damage, you can try resetting the control board by turning off the power to the heating system, waiting for a few minutes, and then turning it back on.
- If resetting the control board doesn’t resolve the issue, you may need to replace it altogether.
It is important to note that working with the control board requires some technical knowledge and skills. If you are not familiar with electrical systems, it is more convenient for you to hire a professional technician to handle the repair or replacement.
Remember that troubleshooting and repairing electrical components can be dangerous and may cause further damage if not done correctly. It is always best to seek professional help in such situations to ensure safety and accurate results.
By checking and addressing issues with the control board, you can often resolve problems related to your heater not working, the heat going out in your house, the heat taking a long time to come on, or the house not heating up to the desired temperature. If your furnace is not kicking on when the temperature drops, it could be a sign of a faulty control board.
If you are experiencing heating issues in your apartment or if your house isn’t heating up, it is important to understand that a broken or malfunctioning control board could be the cause. Contact a professional technician for proper diagnosis and repairs.
Examine the Transformer
One possible reason why your heating system won’t turn on is a malfunctioning transformer. The transformer is responsible for stepping up the voltage from your electrical outlet to a level that is safe for your heating system to use. If the transformer is not working properly, it can prevent your heater from receiving the necessary power to function.
To examine the transformer, follow these steps:
- Turn off the power: Before you begin any inspection or repair work, make sure to turn off the power supply to your heating system. This will ensure your safety and prevent any further damage.
- Locate the transformer: The transformer is typically located near the burner or control panel of your heating system. Consult your owner’s manual or contact a professional if you are unsure of its exact location.
- Inspect for obvious signs of damage: Check for any visible signs of damage, such as a burnt smell, melted wires, or blackened components. If you notice any of these warning signs, it is likely that the transformer is faulty and needs to be replaced.
- Test the voltage: If there are no visible signs of damage, you can use a multimeter to test the voltage output of the transformer. Set the multimeter to the appropriate voltage range and carefully touch the probes to the transformer terminals. If the voltage reading is significantly lower than it should be, it indicates a problem with the transformer.
- Consult a professional: If you have identified a problem with the transformer or are unsure how to proceed, it is best to contact a professional HVAC technician. They have the knowledge and expertise to accurately diagnose and repair any issues with the transformer.
Remember, working with electricity can be dangerous, so if you are not confident in your abilities, it is recommended to hire a professional to inspect and repair your heating system.
Test the Condensate Pump
If your heat is not working in your house and the house isn’t heating up as it should, one possible issue could be with the condensate pump. The condensate pump is responsible for removing the excess water that is produced during the heating process. If this pump is not working properly, it can cause the heating system to malfunction.
To test the condensate pump, follow these steps:
- Locate the condensate pump: The condensate pump is usually located near the furnace or boiler. It is a small, box-like device that may have a drain line connected to it.
- Check for power: Ensure that the condensate pump is receiving power. Look for any visible signs of damage or loose connections. If the pump is unplugged or the power switch is turned off, plug it in or turn on the switch and see if it starts working.
- Test the float switch: The condensate pump has a float switch that detects the water level. If the water level rises too high, it triggers the pump to turn on. Gently raise the float switch to see if the pump starts working. If it does, it indicates that the switch might be sticking or malfunctioning and needs to be replaced.
- Clean the pump: Over time, dust, debris, or algae can accumulate inside the condensate pump, causing it to get clogged. If the pump isn’t working, try cleaning it by removing any visible debris or using a mixture of water and vinegar to remove algae buildup. Ensure that the pump is completely dry before reconnecting it.
- Test the pump by pouring water: Fill a bucket with water and pour it into the condensate pump’s reservoir. If the pump is working properly, it should start pumping out the water. If it doesn’t, the pump may be faulty and require replacement.
If the condensate pump is not functioning correctly, it is more convenient to rely on professional help to handle the repair or replacement. HVAC technicians have the necessary expertise and tools to diagnose and fix any issues with the condensate pump.
Remember, if your heat is not working and your house is not heating up to the desired temperature, there could be various reasons. The condensate pump is just one component to consider. It’s always best to consult a professional HVAC technician to accurately diagnose and resolve the problem.
Look for Heat Exchange Issues
If your heating system is not turning on, it’s essential to look for any heat exchange issues. Heat exchange problems can prevent your heater from operating efficiently or at all, leading to a lack of heat in your home. Here are some possible reasons why your heat isn’t working:
- Dirty or clogged air filters: A dirty air filter can restrict airflow, causing your heating system to overheat and shut off. Make sure to clean or replace your air filters regularly to ensure proper heat exchange.
- Blocked vents or registers: Obstructions in your vents or registers can impede the flow of heat into your living spaces. Check for any blockages and clear them if necessary.
- Faulty thermostat: A malfunctioning thermostat may not send the correct signals to your heating system, preventing it from turning on when the temperature drops. Consider replacing your thermostat or checking its batteries.
- Unbalanced or closed dampers: Dampers are valves in your heating system that control the airflow. If they are closed or unbalanced, it can restrict the heat exchange and result in a lack of warmth in your home.
- Broken blower motor: The blower motor is responsible for circulating the heated air throughout your home. If it is not working correctly, the heat may not be distributed efficiently or may not reach the desired temperature.
If you have inspected these potential issues, but your heat is still not working, it is recommended to contact a professional HVAC technician. They have the expertise and tools to diagnose and fix more complex heat exchange problems. Additionally, regular maintenance of your heating system can help prevent heat exchange issues and ensure its optimal performance.
Remember, dealing with heat exchange problems can be challenging if you lack the necessary knowledge and experience. Therefore, it is more convenient for you to handle the situation by contacting a professional who can provide accurate results and fix the problem efficiently.
Question-answer:
What should I do if my heating system won’t turn on?
If your heating system won’t turn on, there are a few steps you can take to troubleshoot the issue. First, check if the thermostat is set properly and the batteries are not dead. Next, make sure the circuit breaker for the heating system is on. If these steps don’t solve the problem, you may need to call a professional HVAC technician to inspect and repair the system.
Why is my heating system not turning on even though the thermostat is set correctly?
If your heating system is not turning on despite the thermostat being set correctly, there could be a few potential issues. It is possible that there is a problem with the thermostat itself, such as a malfunctioning sensor or wiring issue. Another possibility is that there is an issue with the electrical connections or circuitry within the heating system. In either case, it is recommended to contact a professional HVAC technician for further diagnosis and repair.
What can cause a heating system to not turn on?
There are several potential reasons why a heating system may not turn on. Some common causes include a tripped circuit breaker, a malfunctioning thermostat, a faulty pilot light, or a problem with the electrical connections or components within the heating system. It is best to have a professional HVAC technician inspect and diagnose the specific issue with your heating system.
Can a clogged air filter prevent a heating system from turning on?
Yes, a clogged air filter can potentially prevent a heating system from turning on. When the air filter becomes clogged with dust and debris, it restricts the airflow to the heating system. This can cause the system to overheat and trigger a safety mechanism that shuts off the unit to prevent further damage. It is important to regularly clean or replace the air filter to ensure proper airflow and prevent issues with the heating system.
What should I do if my heating system won’t turn on after a power outage?
If your heating system won’t turn on after a power outage, start by checking if the circuit breaker for the system is in the “On” position. If it has tripped, reset it and see if the system starts working. If that doesn’t solve the problem, try turning off the power to the system for a few minutes and then turning it back on. If the issue persists, it is advisable to call a professional HVAC technician to inspect and repair the system.
Is it safe to attempt to fix a heating system that won’t turn on by myself?
While there are some basic troubleshooting steps you can take, such as checking the thermostat and circuit breaker, it is generally not recommended to attempt fixing a heating system on your own. Heating systems are complex and can involve electrical components, gas lines, and potentially hazardous situations. It is safer and more effective to have a professional HVAC technician diagnose and repair the issue to avoid any potential risks or further damage to the system.